Select the course and term
Open PowerTeacher Pro and select the course that you want to enter comments for.
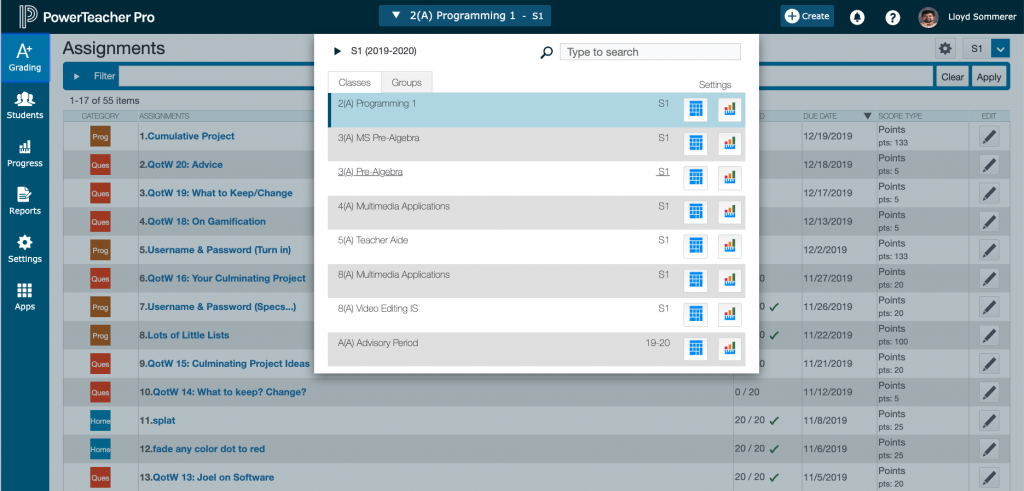
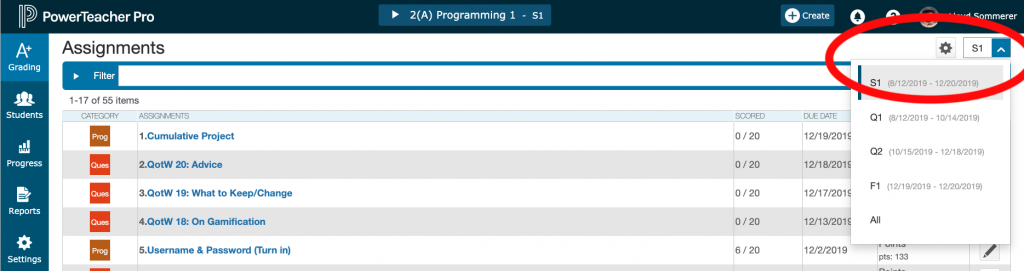
Select the S1 or S2 term for semester and year long classes. Hexamester classes should have the correct hexamester selected already. We do not typically enter comments for quarters.
Go to the Comment Page
From the menu on the left hand side of the screen choose “A+ Grading” and in the lower section of the fly-out menu choose “Comment Verification”.

Note: You can also add comments by clicking on the Course Grade on the Score Sheet screen for each class. This might be useful if you want to look at certain grades while you make comments, but will not let you see all of your comments at once. All of the rest of the instructions still apply no matter which screen you start from.
Enter Comments
- Select the student by clicking on their grade or the comment section after their grade. really, you can click anywhere but on their name. Clicking on their name will take you to a different screen and you’ll have to click the back button.
- Type in your comments.
- Choose another student, add another comment and repeat.
- When you are done with all of your comments, or ready to stop for the time being, remember to click the green “Save” button.
NOTE: This screen is also where you would indicate that a grade is Incomplete (don’t forget to fill out the Incomplete Grade Form, and make any manual changes to a student’s grade on the rare occasion when that is necessary.

Using the Comment Bank
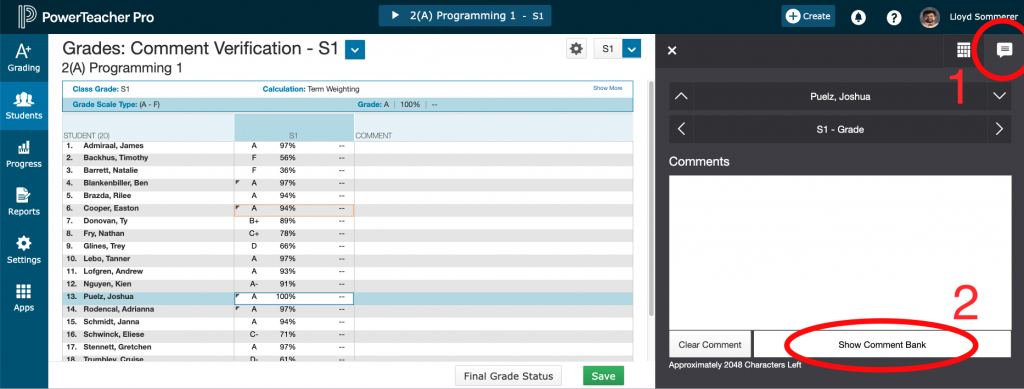
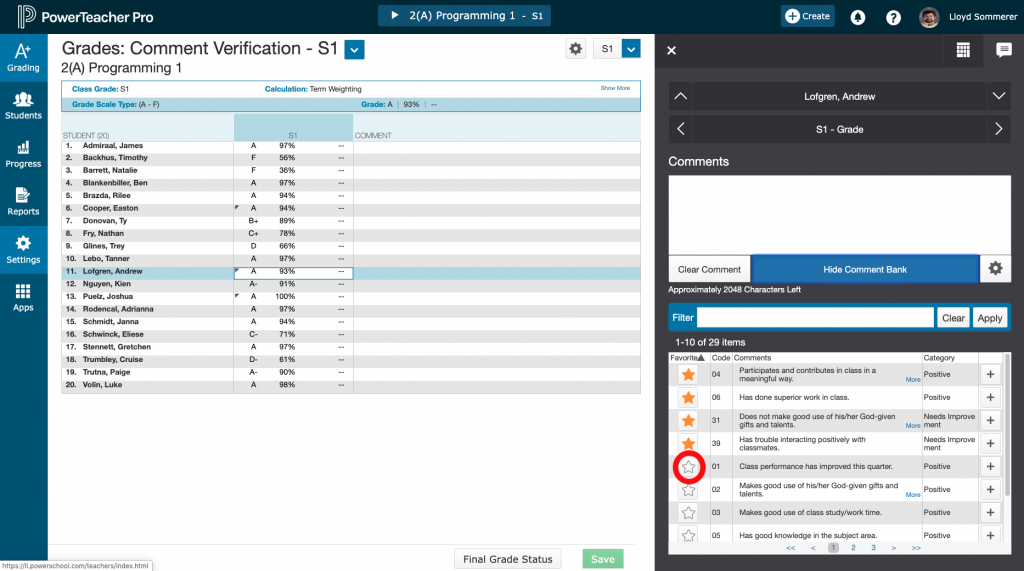
Click the comment button in the upper right (under your name), then click the “Show Comment Bank” button at the bottom of the screen.
To add predefined comments, click on the plus sign after the comment. The comment will appear in the comment section above and you can edit it is you want to. You can add as many comments as you like.
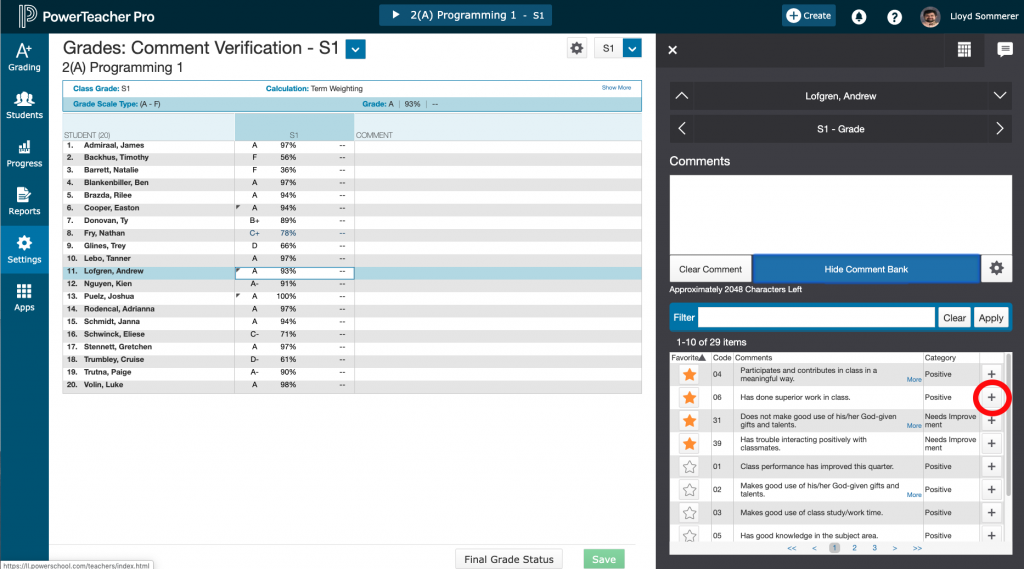
You can favorite comments by click on the star to the left of the comment. If you click the star again, it will be removed from your favorites. Your favorites will appear at the top of the list once you leave this page and return to it, so it might be a good use of your time to read through the comment bank comments and favorite the ones that speak deeply to your soul.
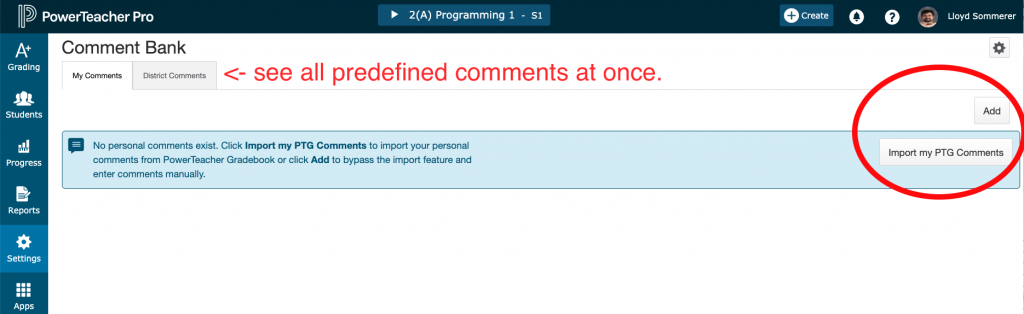
NOTE: You can also view and favorite all of the predefined comments at once from the District Comment tab on the Manage Comment section of the Comment Bank Settings menu (see below). I think it’s easier to favorite them when you can see them all at once.
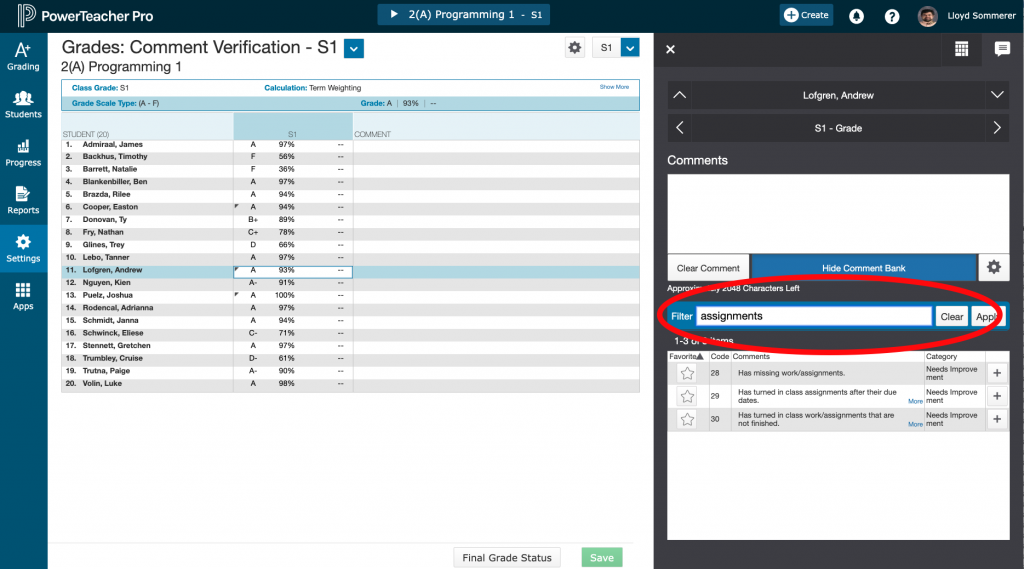
You can also filter comments instead of scrolling through the list by entering a word in the filter field and pressing Enter or clicking on apply. All of the comments that contain your filtered word will appear. Note that the default comment bank is not particularly consistent, so you might have to search for “assignment”, “homework”, or “work” to find what you want.
Comment Bank Settings
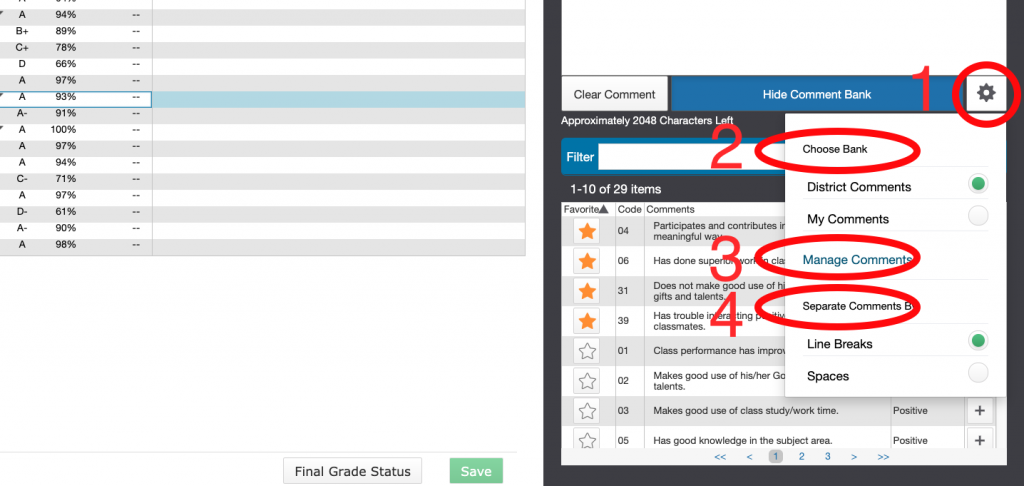
You can add your own comment bank and make a few other changes from the Comment Bank Settings.
- Click on the gear icon to open the setting menu
- Choose whether you want to see the District Comments (this is the default), or your comment bank. If you choose “My Comments” and you haven’t created your comments yet, that’s okay. You can do that later
- The Manage Comments link will allow you to add comments to your personal comment bank and to import your comments from the old PowerGrade program.
- Separate Comments By only applies if you add more than one comment for a student. You can select to have each comment on a new line or to separate them with a space. I would suggest that you change this to “Spaces”. I think this will look a lot better on our report cards.
Adding your own comments
To add comments to your comment back, or to edit your comments, click on the “Manage Comments” link in the Comment Bank Settings menu (#3 above). If you have already added some comments to students, you will be prompted to “Save and Continue” before doing so.
You can also get to the Comment Bank directly from the menu on the left: Settings -> Comment Bank.
NOTE: If you want to import your old comments from the old gradebook, you have to do that before you manually add any new comments. PowerTeacher will warn you about that if you click “Add” before you click “Import my PTG Comments”. If you make a mistake here, you can delete any comments you have added and then you will be able to import from teh old gradebook again.
After you import any comments that you might have added from the old gradebook, you can add new comments.
- Click on the Add button
- Enter a Code. It used to be that you could add a comment just by typing the code, but I don’t know how to do that in the new gradebook, and I can’t find any reference for it in the help screens. Make this short, for instance, I used “EH” for “I enjoyed having <student’s name> in class.”
- Enter a category (this is optional). The default categories are “positive” and “needs improvement”. You can (here I am just assuming) add new categories if you want. Maybe for specific classes or whatever. You can view comments by categories later.
- Uncheck “Favorite” if you don’t want this comments to automatically appear at the top of your comment list.
- Enter your comment. Note that you can insert “Smart Text” for things like the student’s name, pronouns based on the student’s gender and so forth. When you use this comment, PowerSchool will automatically fill those in for each student.
- Click Save
