If you are substitute teaching in a classroom where the regular teacher is “Zooming” in to teach the class, your job is to help setup the classroom technology, to facilitate the interactions between the students and the remote teacher, and to generally supervise the classroom. If you are substituting in a normal substitute situation where the regular teacher will not be present, follow these instructions instead. The office will be able to tell you which situation you are in.
Note: Please feel free to contact either the Principal. Matt Heibel, or the Technology Coordinator, Lloyd Sommerer, to assist with any of these instructions, especially the first few times you are substituting.
Setting up the teacher’s computer
- Log in to the teacher’s computer as you normally would (see the substitute folder for details).
Login and find your Canvas Course
- Navigate to the teacher’s Canvas Course:
- In a browser, go to Canvas (http://ll.instructure.com)
- Login with the normal substitute teacher username and password (see folder).
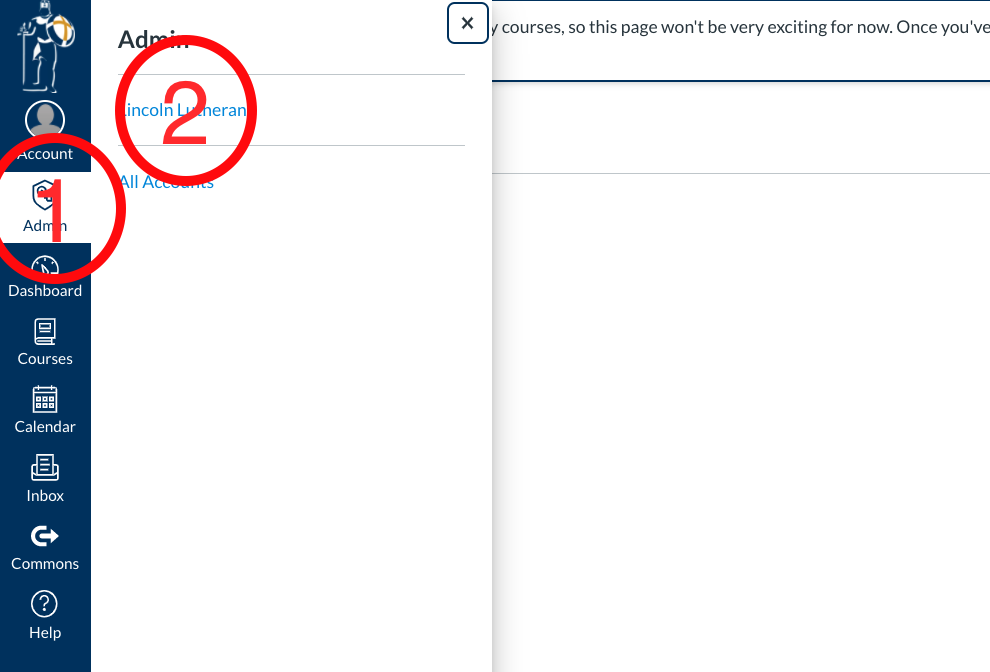
- Click on the “Admin” link from the blue menu on the left, then click on “Lincoln Lutheran”.
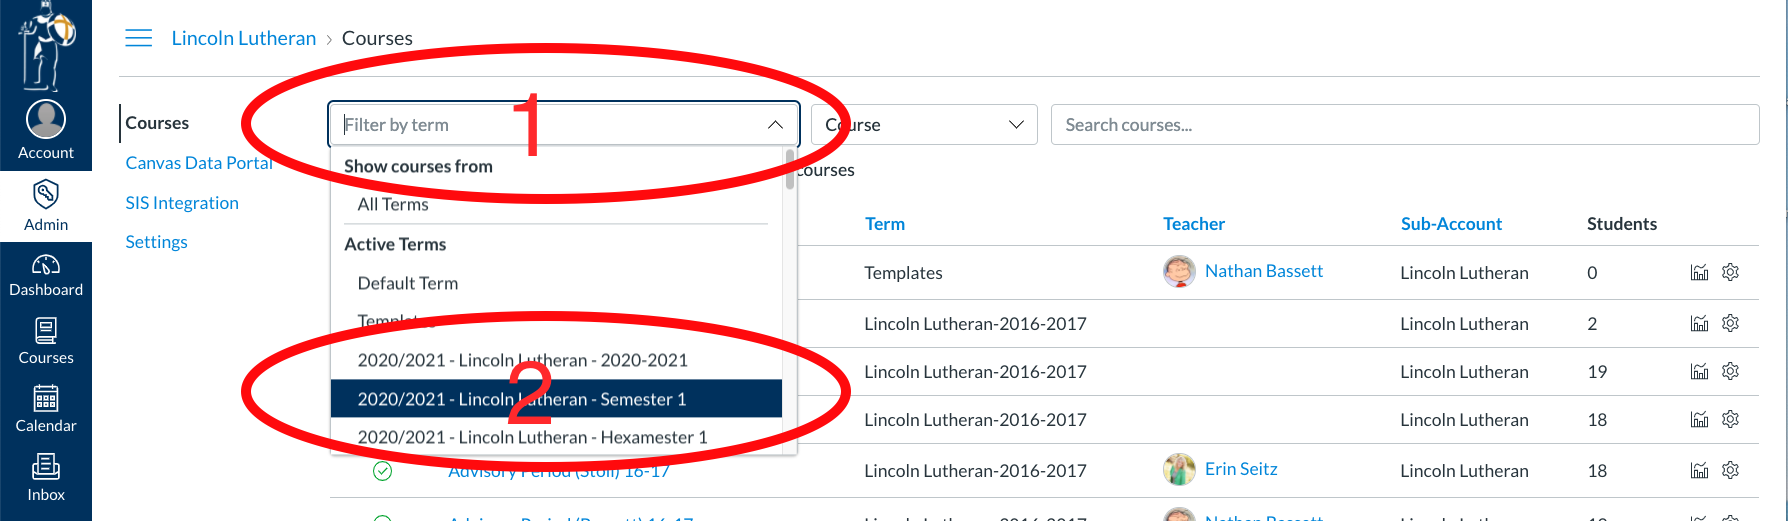
- Click on the “Filter by Term” box and then choose the current term. This is probably Semester 1 or Semester 2 of the current school year, but may be one of the Hexamester terms for middle school exploratory courses. If you are not sure, the students or a fellow teacher can tell you.
- Type in the name of the teacher for whom you are substituting and their courses should appear.
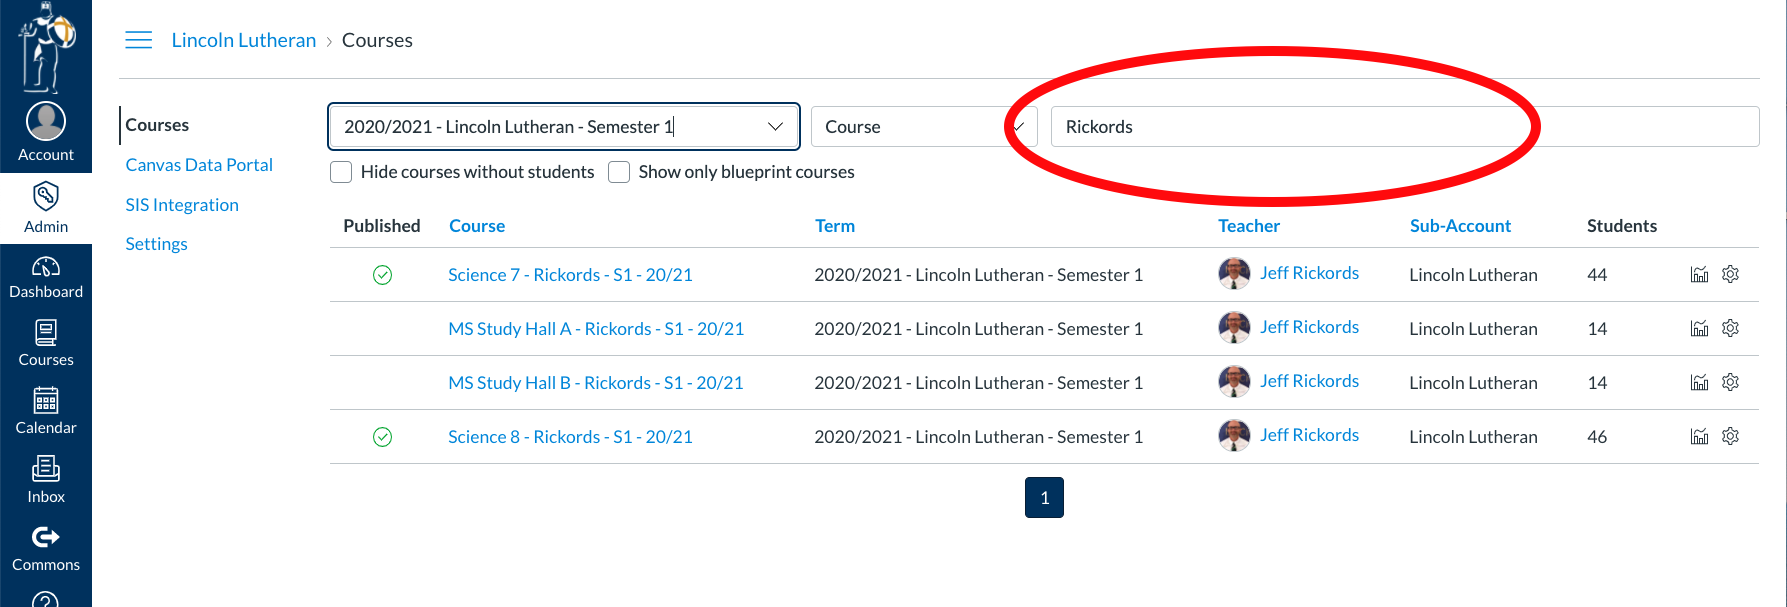
- Click on the course that you have next.
Join and setup the Zoom meeting.
- A link to the Zoom meeting for that course should be at or near the top of the page that appears. Click on the link to the Zoom meeting to join the meeting (You might find that the regular teacher is already in the meeting, or you might be the first person in the meeting and the regular teacher will join shortly).
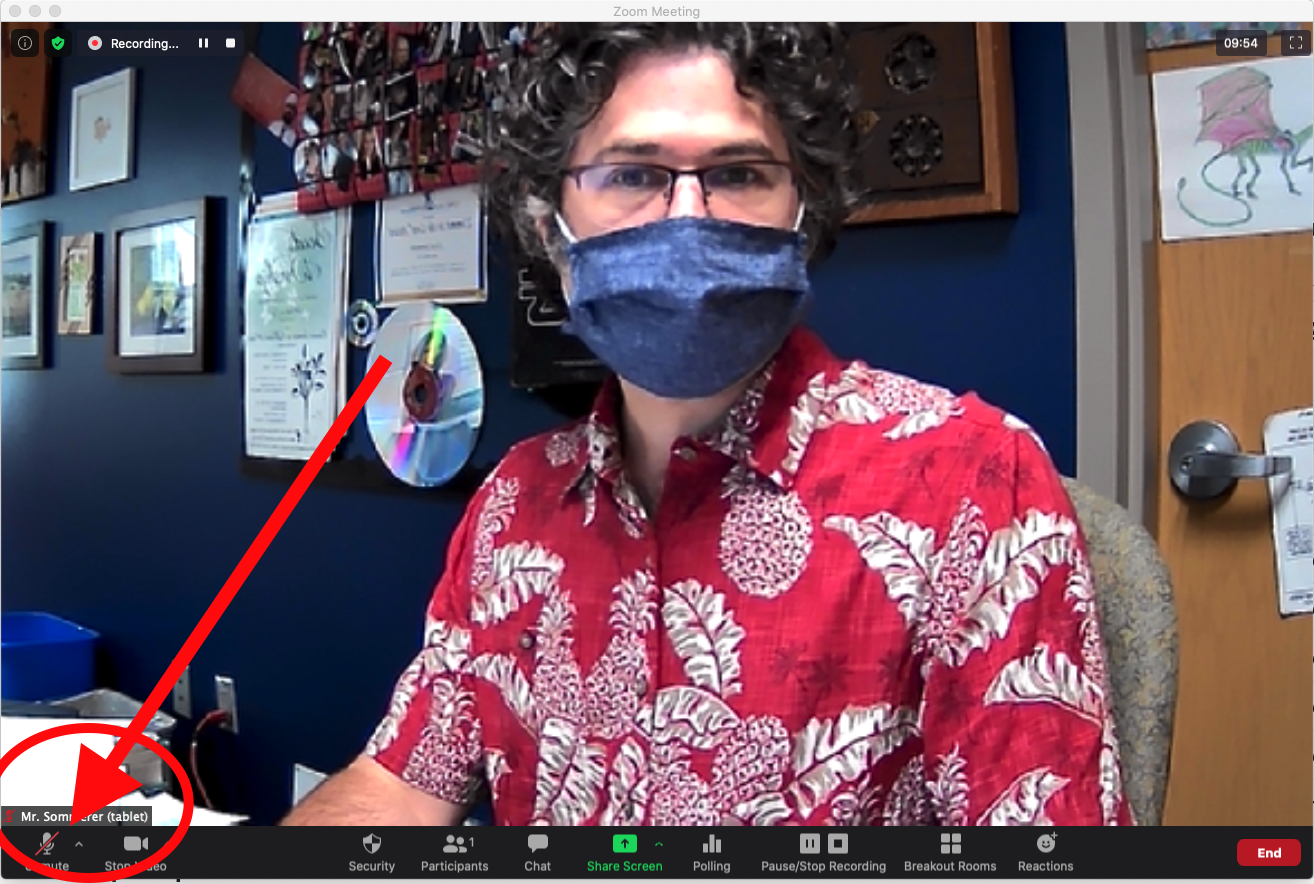
NOTE: If you are prompted to log in to Zoom, you can log in with the Zoom login information found on a card in your substitute folder. Just click on the Sign in with Google button and enter the information on the card. - Mute the webcam microphone by clicking on the microphone icon in the lower left corner of the main Zoom window. Zoom will ask you if you are sure you want to mute yourself with a pop-up dialog. The right answer is “Record without Audio”.
- Turn the sound all the way down on the computer. This will prevent an audio feedback loop that will make your head hurt.
- Turn on the Projector with the white remote that should be on the teacher’s desk (or wherever they keep their remotes). One of the monitors on the teacher’s desk should be mirrored on the Screen. If you see a blue screen instead, press the source Search button on the remote and it should find the monitor. Position the Zoom window on the projector screen by dragging it onto the correct monitor. (I don’t know which one. Just drag it around and watch the TV). Make the Zoom window as big as possible. This is how the students will see the regular teacher and how the teacher will share their screen with the students.
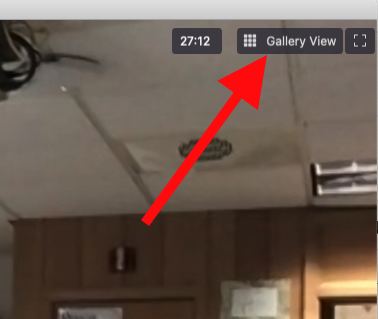
- After the regular teacher or a student joins the meeting, change it to Gallery view by clicking Gallery View in the upper right corner of the Zoom window.
- Once you are in Gallery View, “pin” the teacher by hovering over their image, clicking on the blue ellipsis that appears in the upper right hand corner of their image, and selecting “Pin video on the first screen” (or something like that). This will make it so the students always see the regular teacher on the TV.
Setup the Swivl Camera
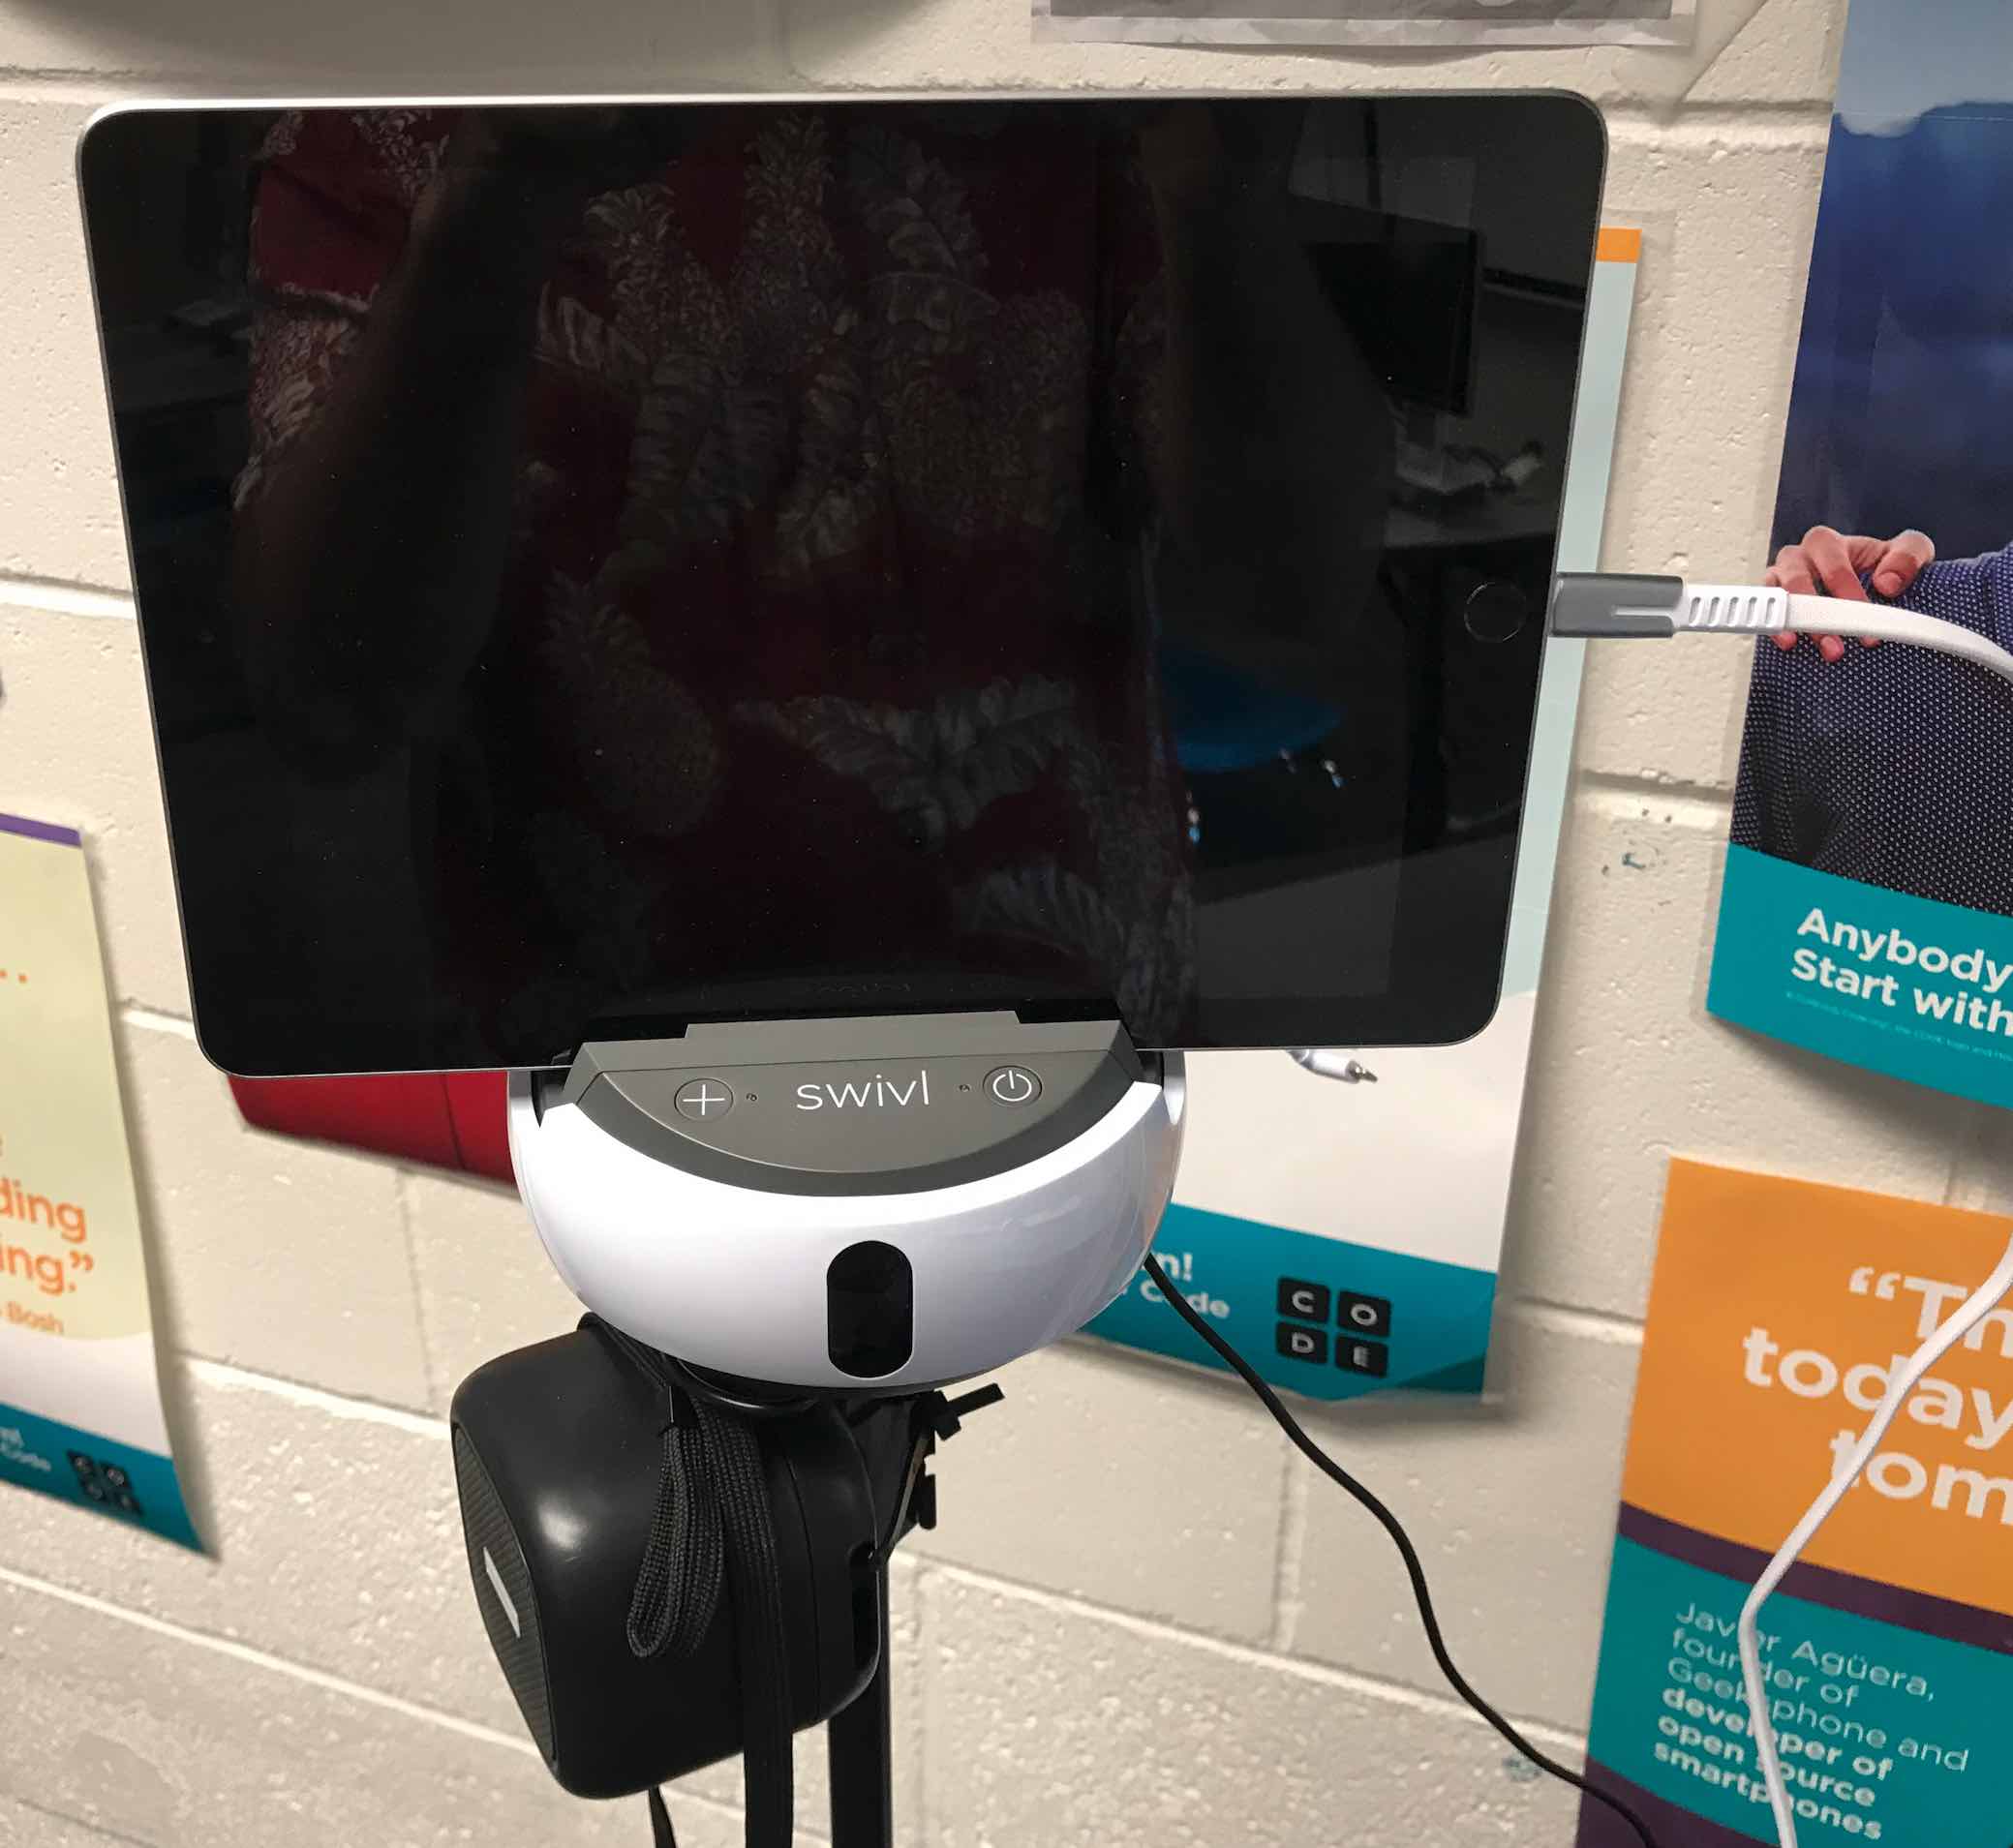
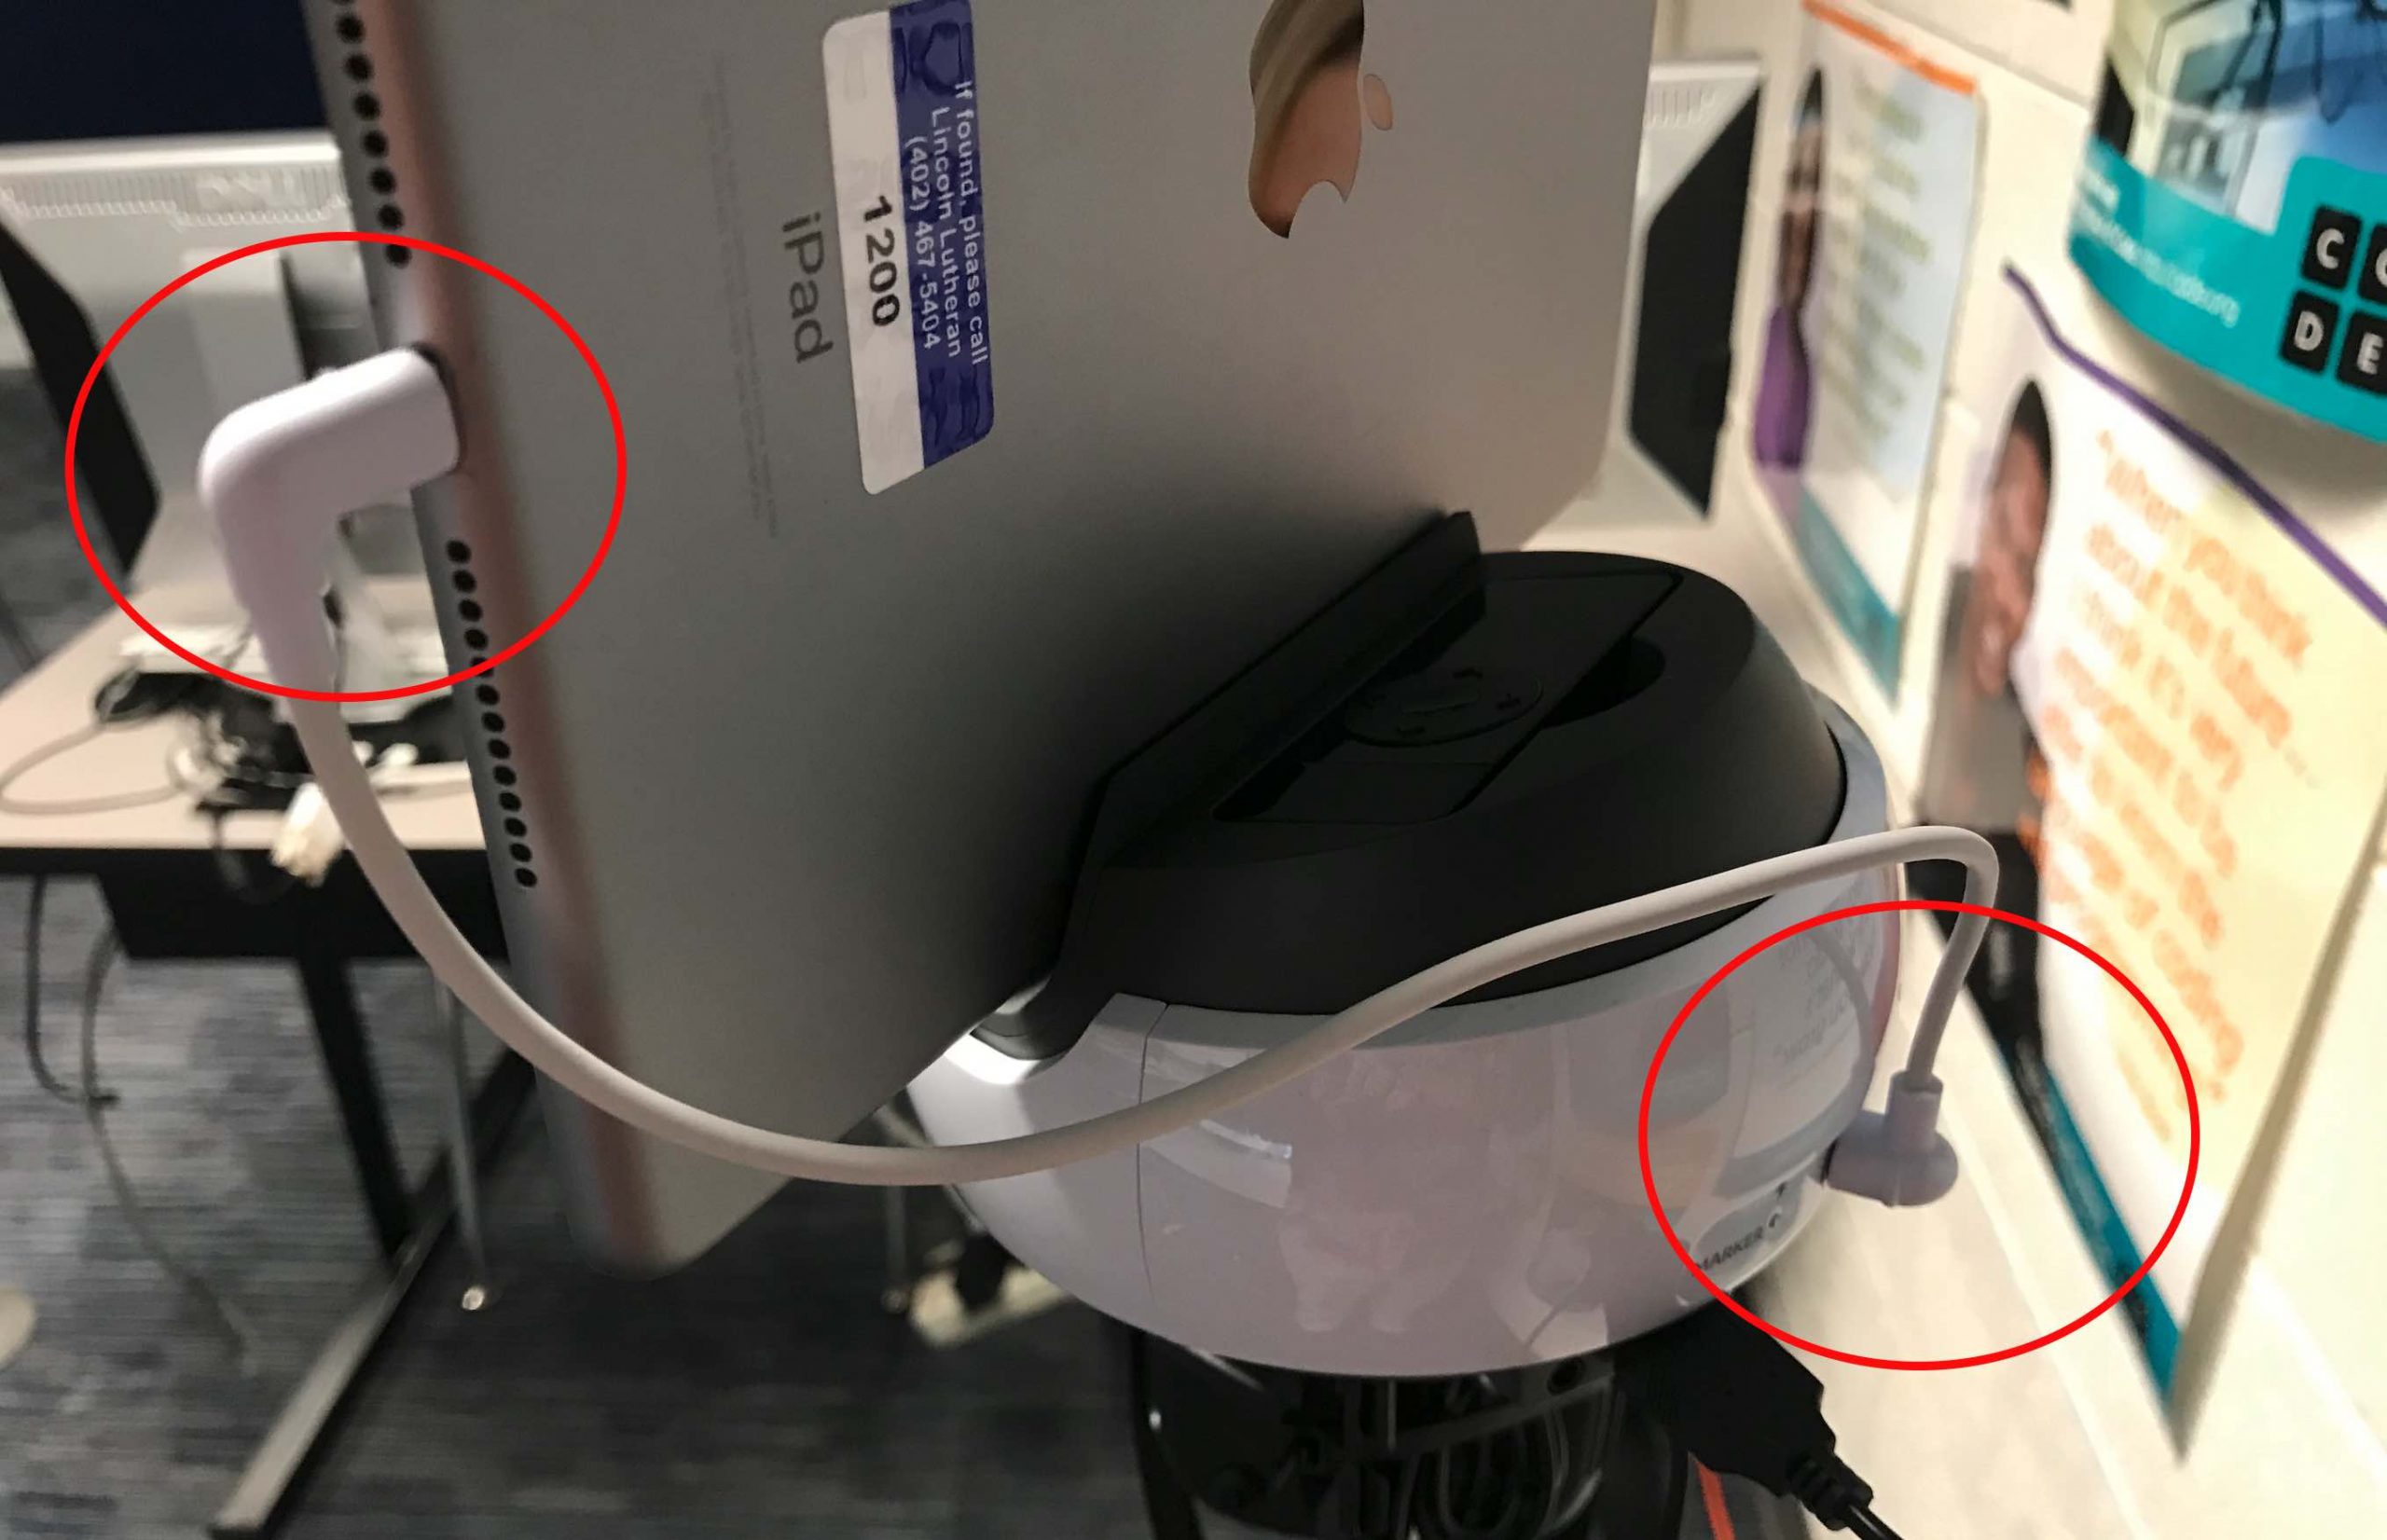
- 600The Swivl camera is how the regular teacher will see and talk to the class. It is probably located near the TV and looks like this:
- Disconnect the two charging cables that run from behind the TV to the Swivl and iPad. You will reconnect these over Lunch so the Swivl and iPad can recharge (and again at the end of the day).
- Turn on the iPad by pressing the Home button (on the right front of the iPad) twice.
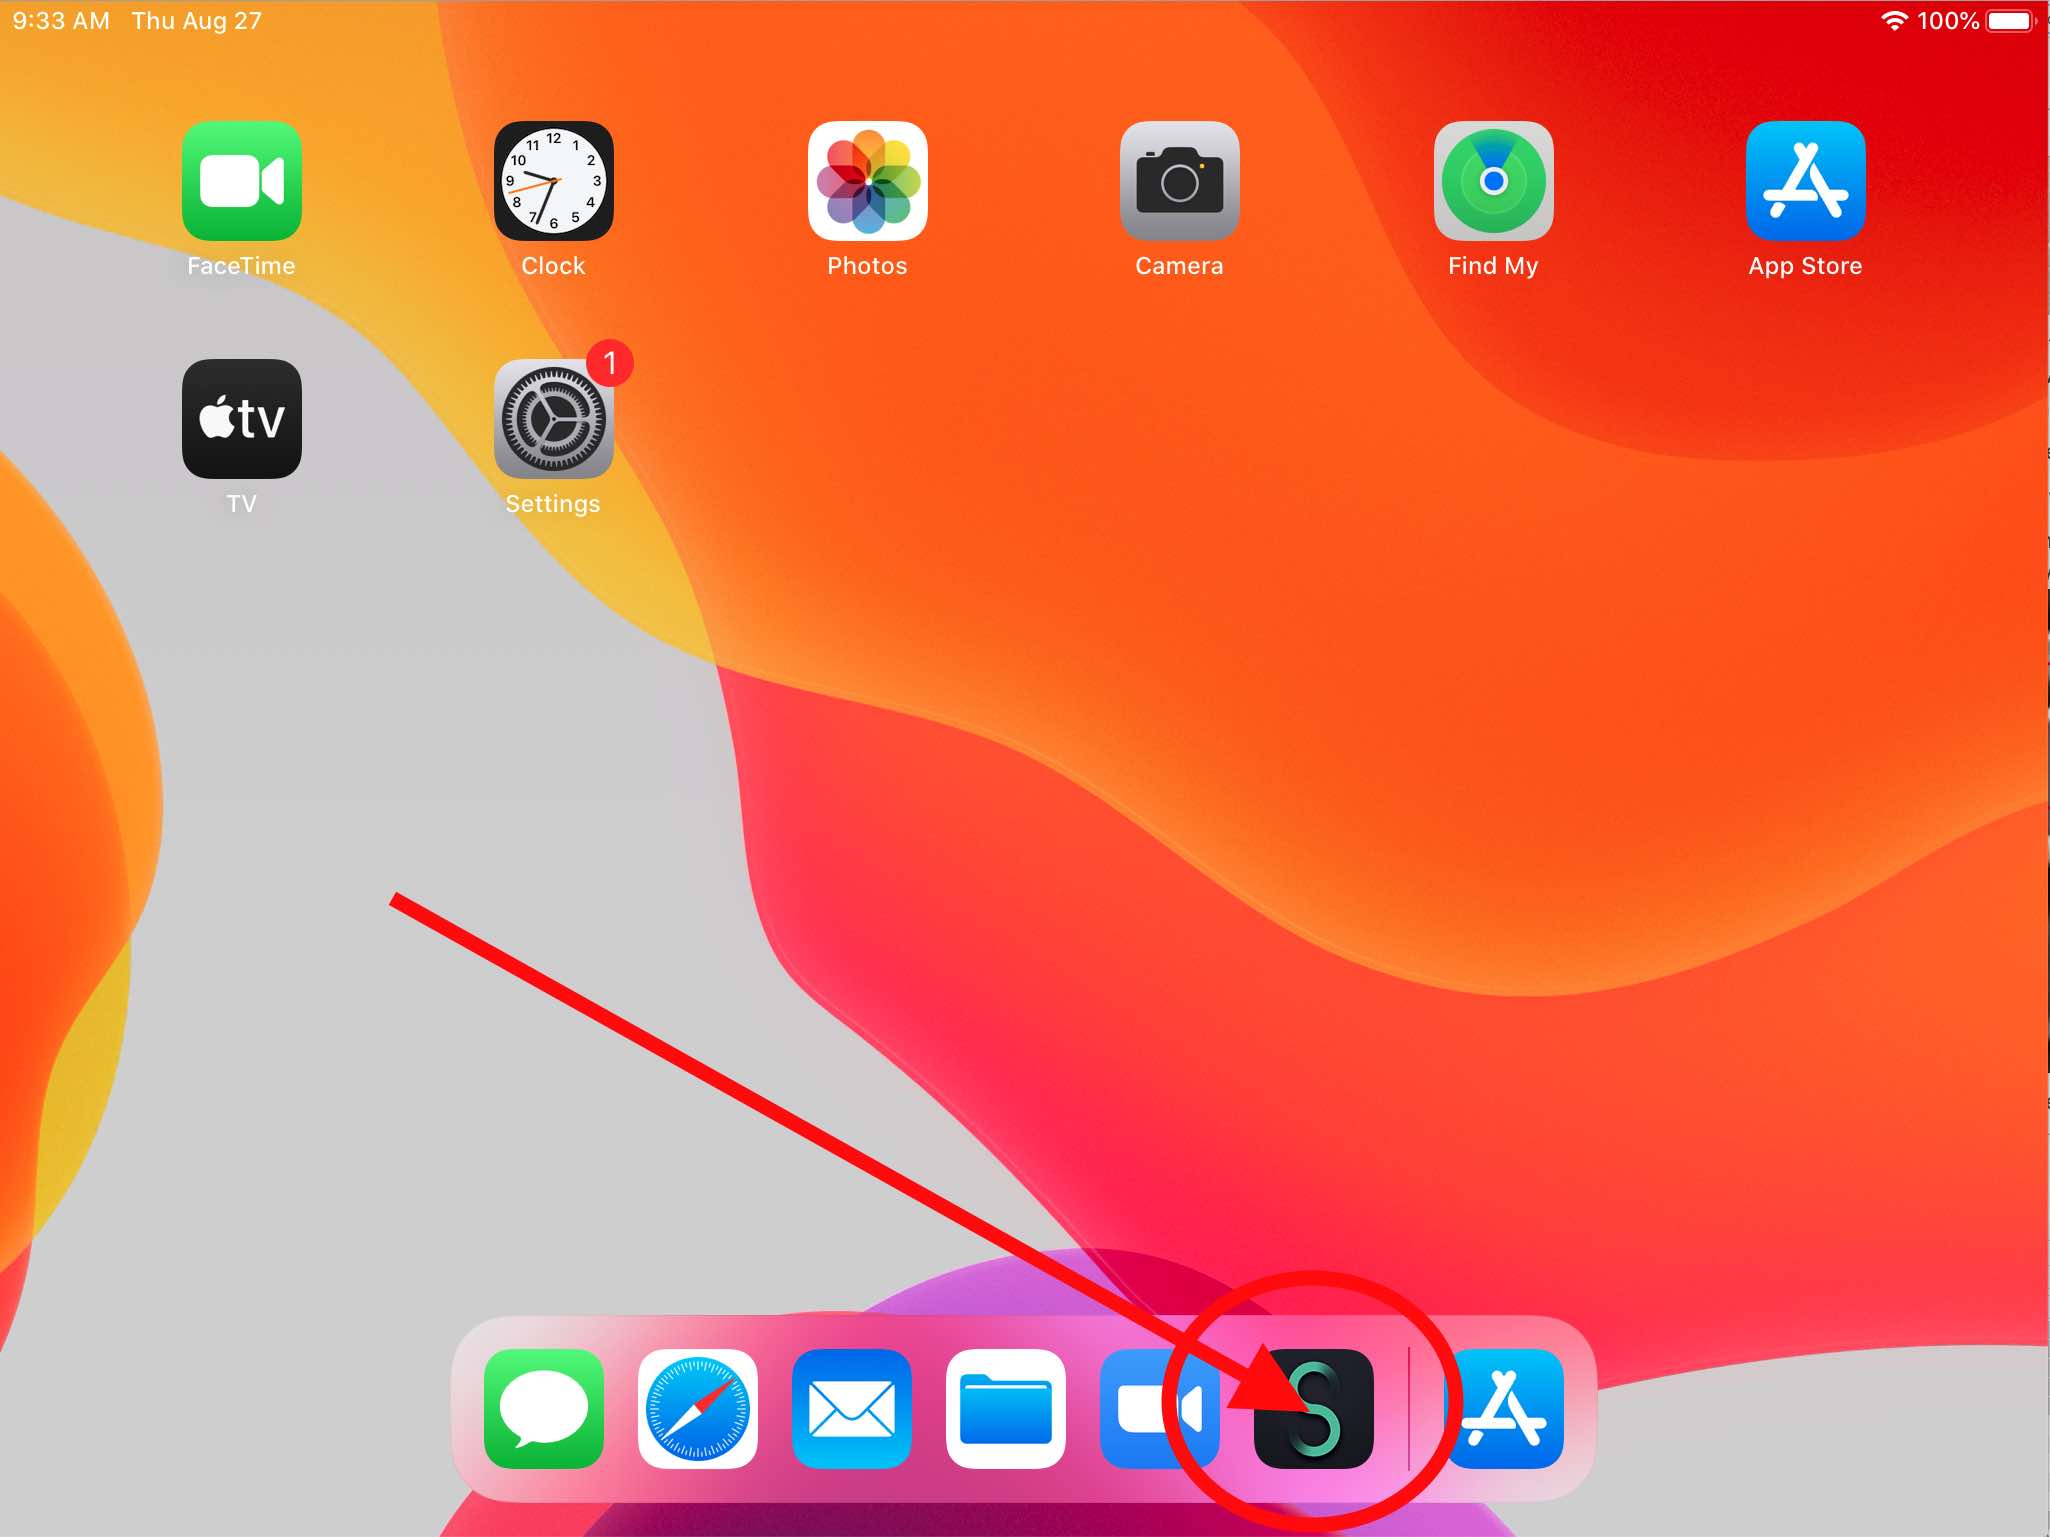
- Start the Swivl app by clicking on the Swivl icon in the dock.
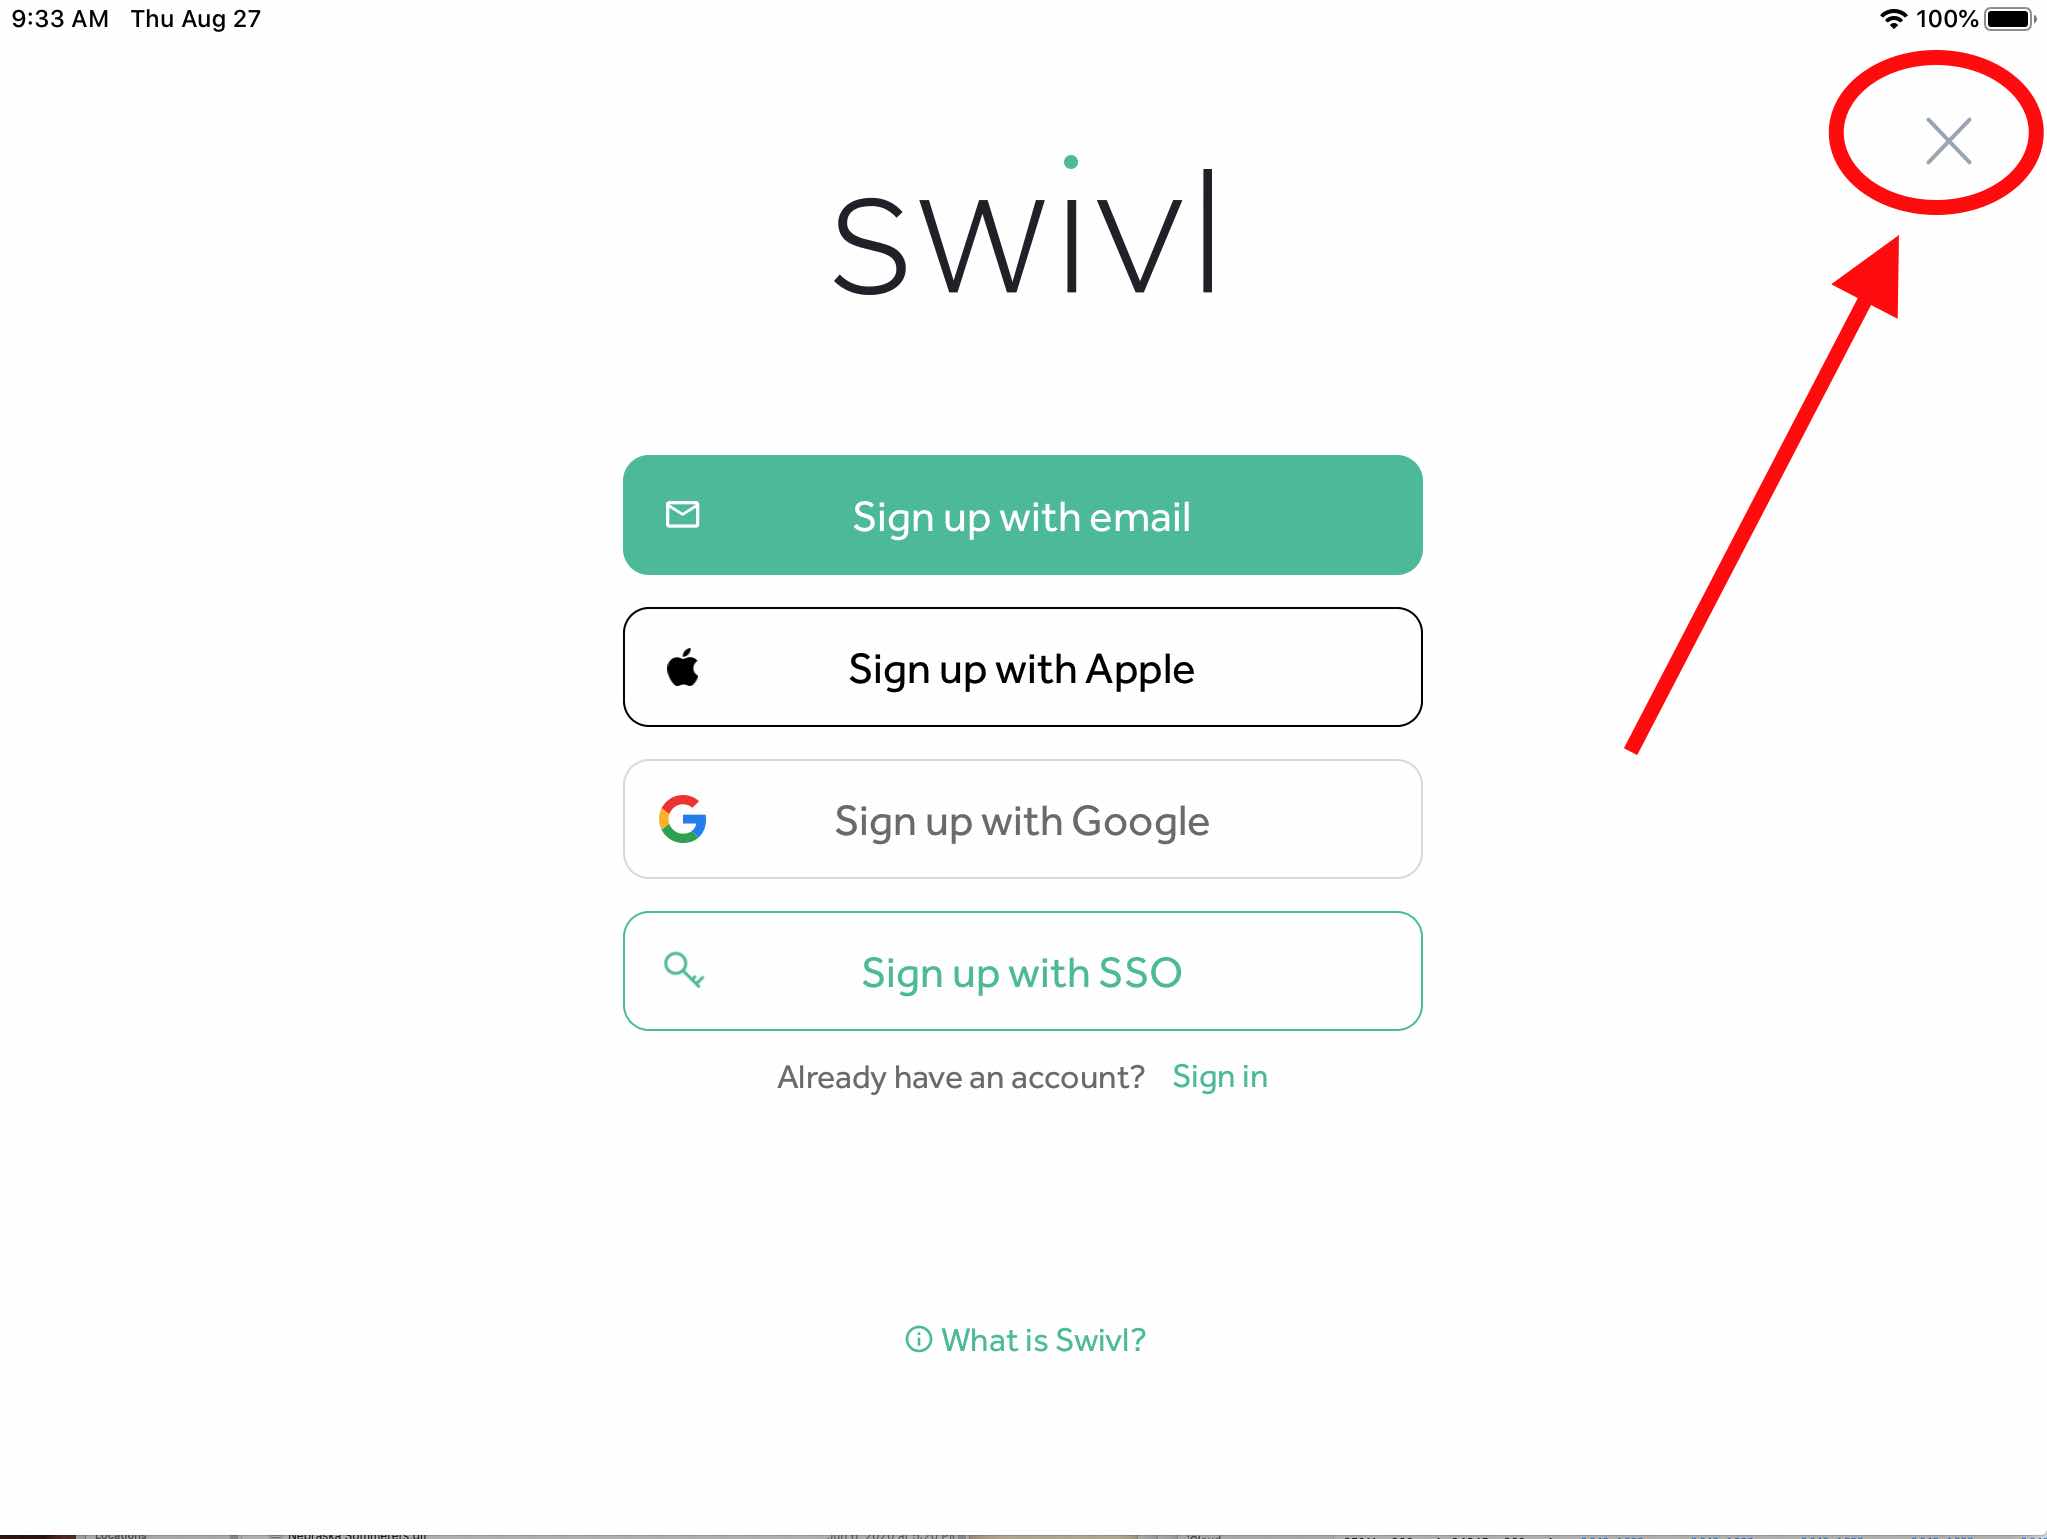
- Bypass the Swivl login screen by tapping the X in the upper right hand corner of the iPad screen.
- Connect the white cable from the back to the Swivl to the side of the iPad. This is how the Swivl and the iPad communicate.
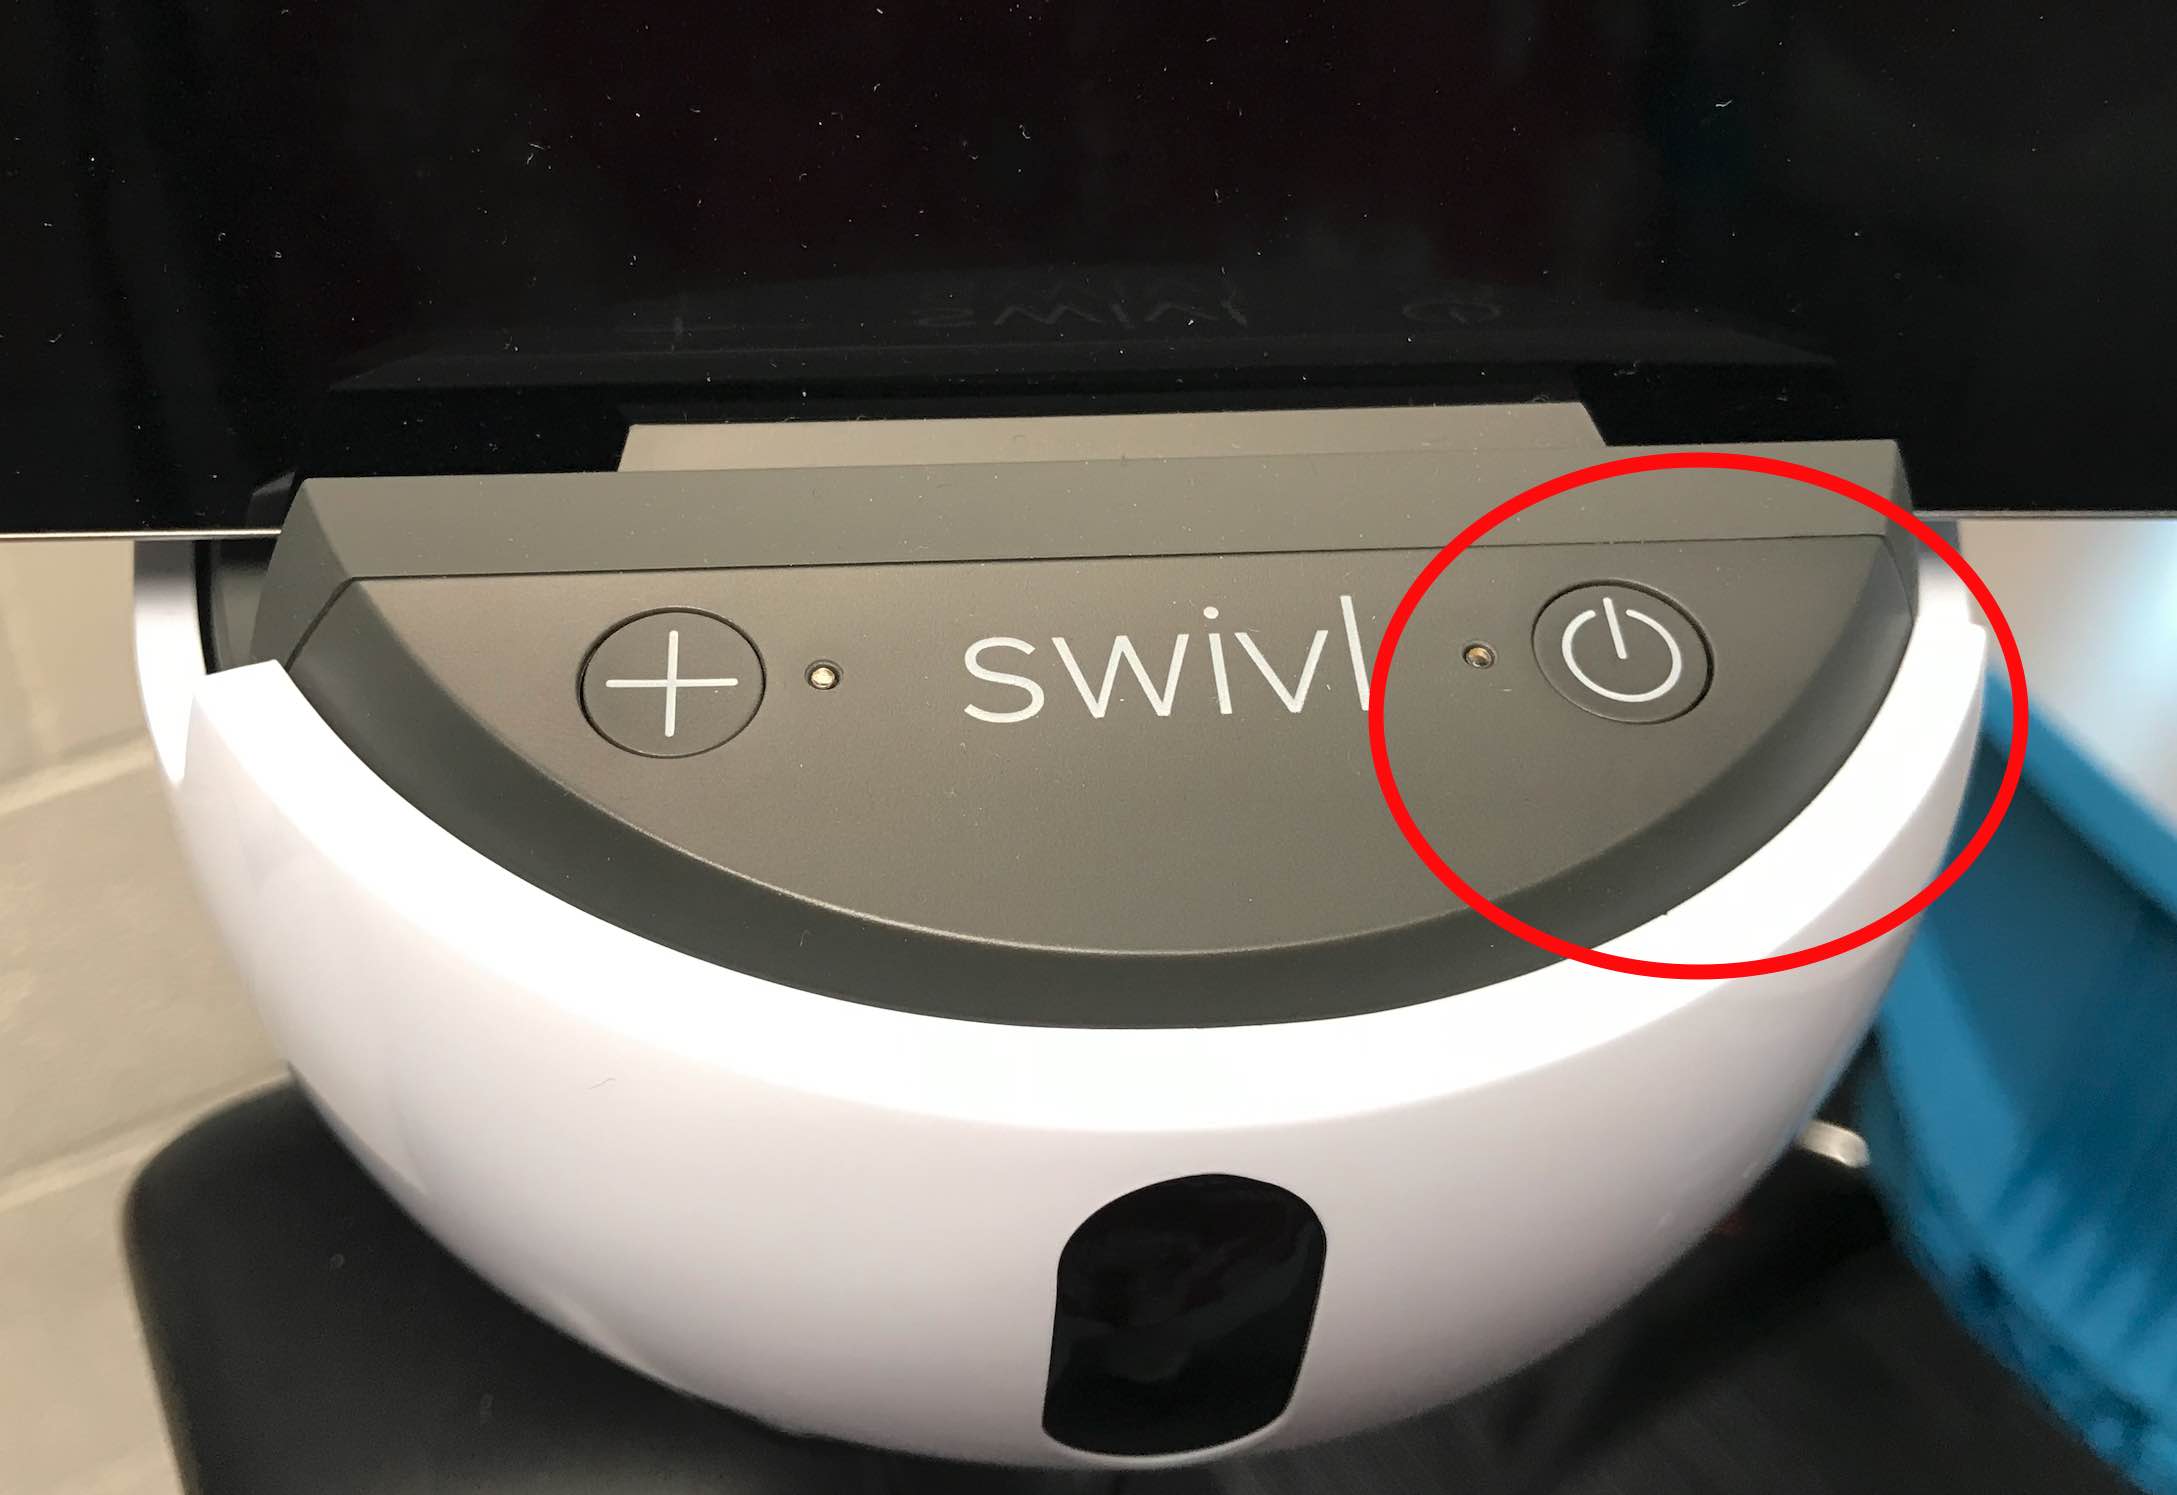
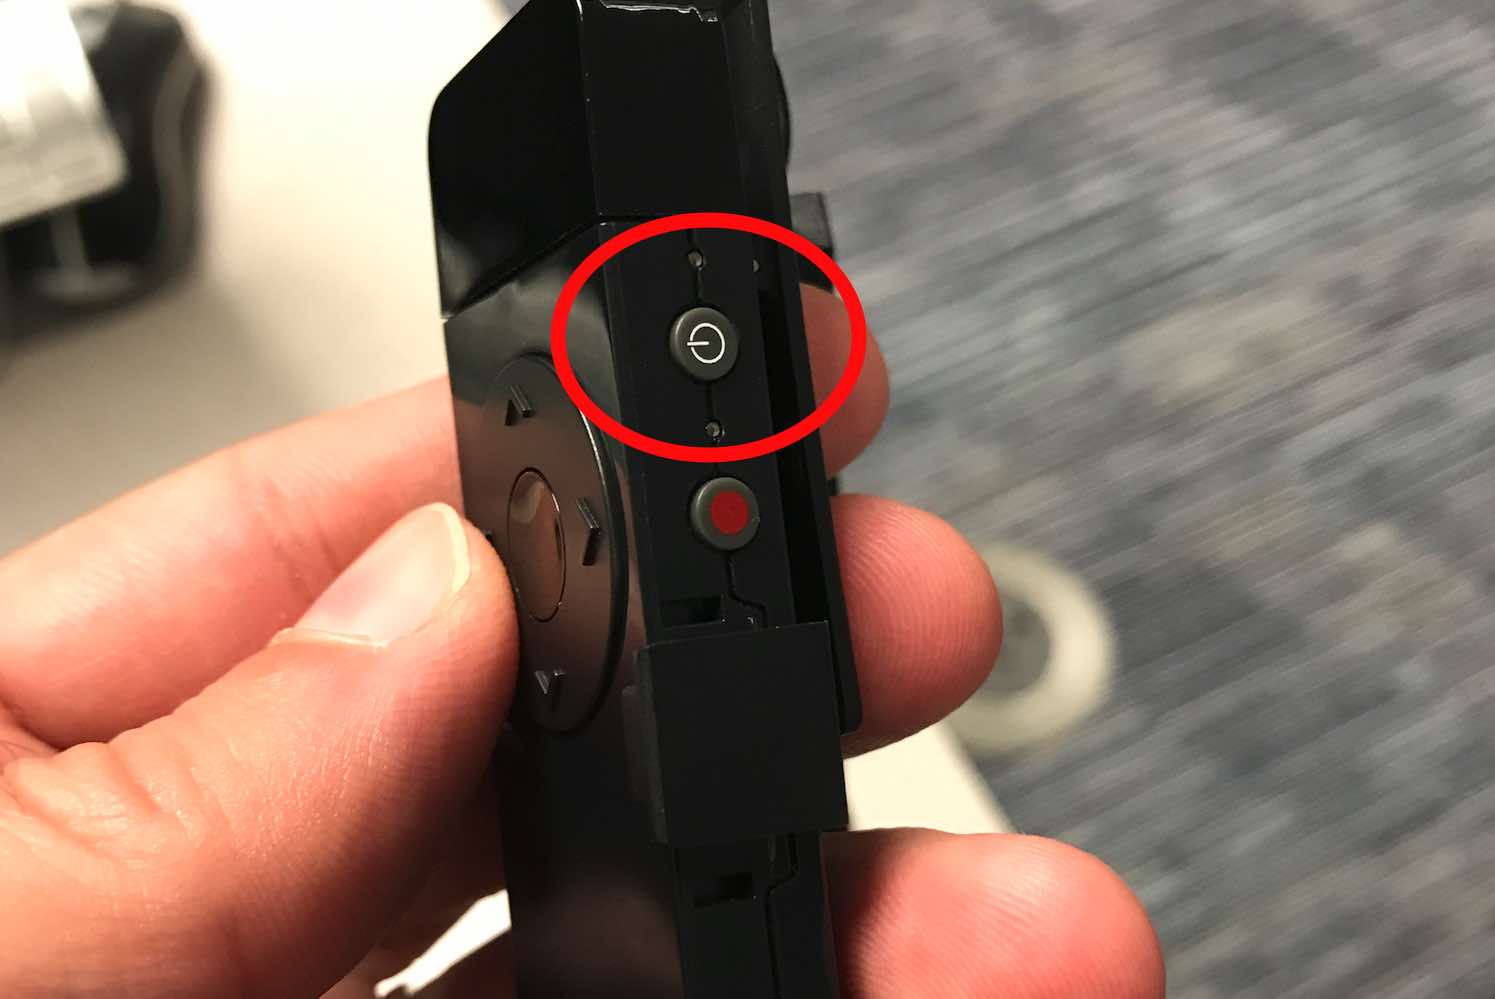
- Turn on the Swivl by holding the power button on the from t of the Swivl for a second (longer than just a tap).
- The iPad will ask to communicate with the Swivl. You should allow it to.
- Remove the Microphone/Marker from the back of the Swivl. This is the microphone that you will wear so that the regular teacher can hear you.
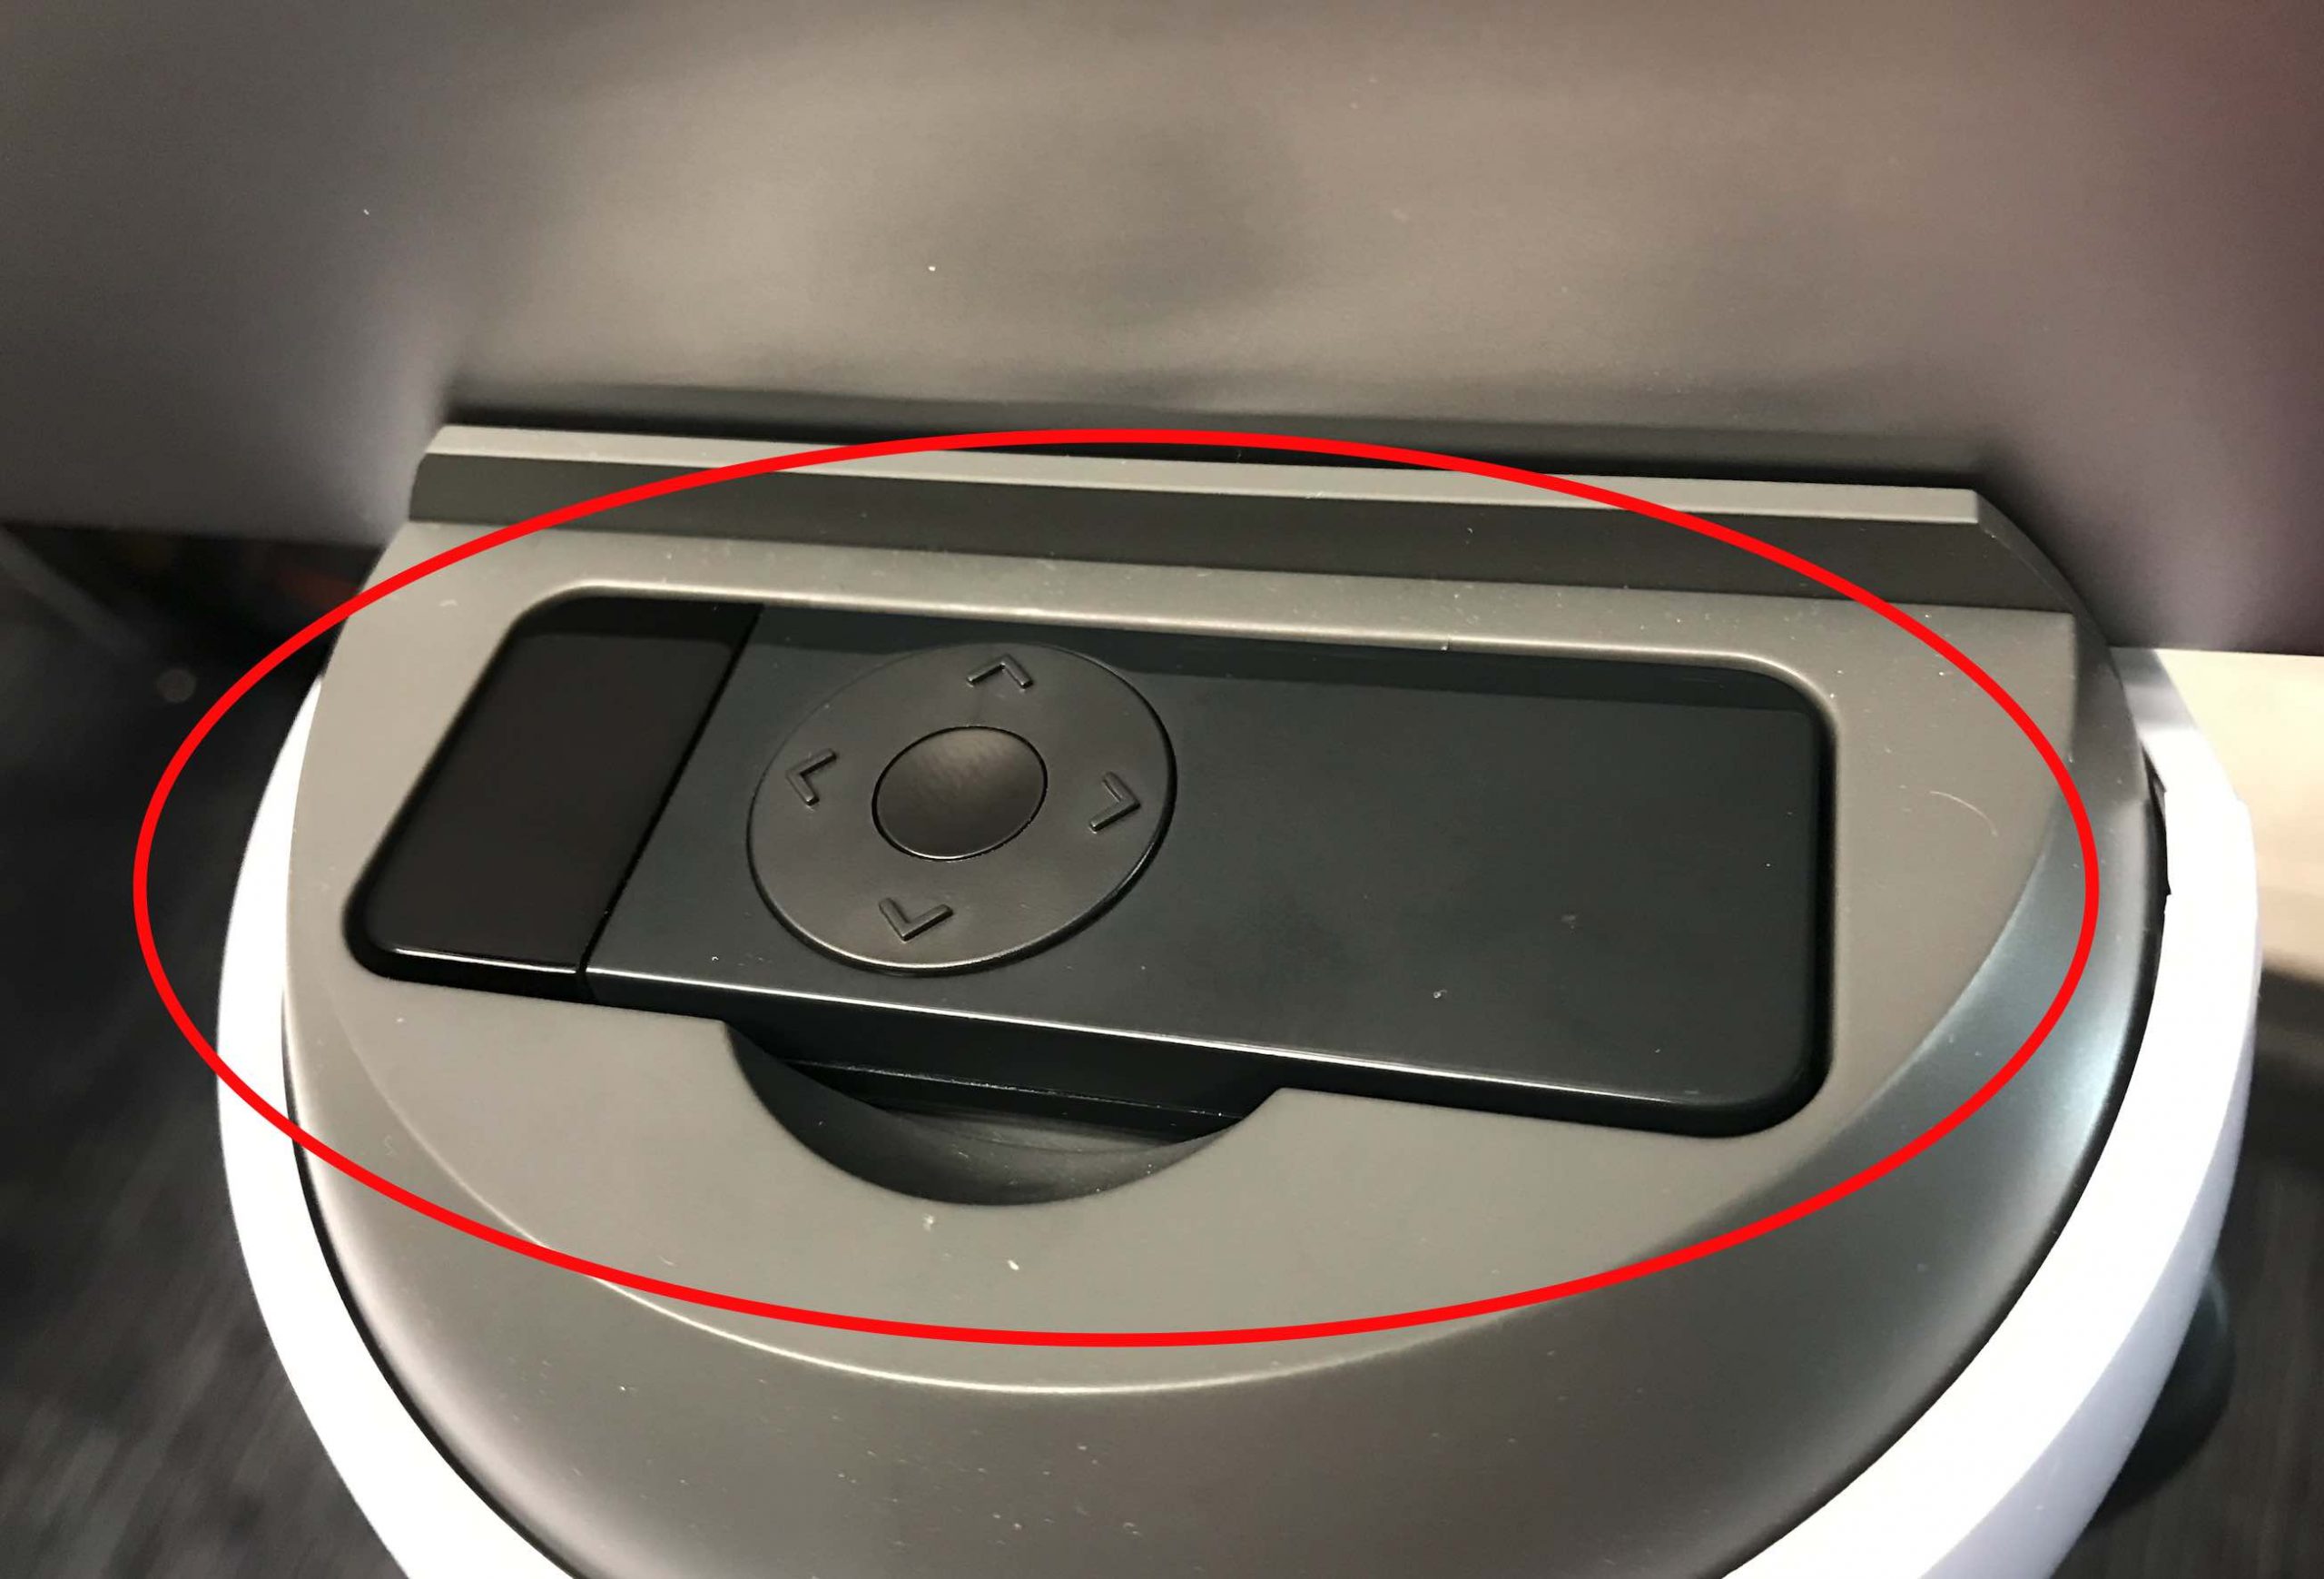
- Place Microphone/Marker in the lanyard which is probably hanging from the Swivl. It might also be on the teacher’s desk. Note that the darker part of the Microphone/Marker should be toward the top when you wear the lanyard.
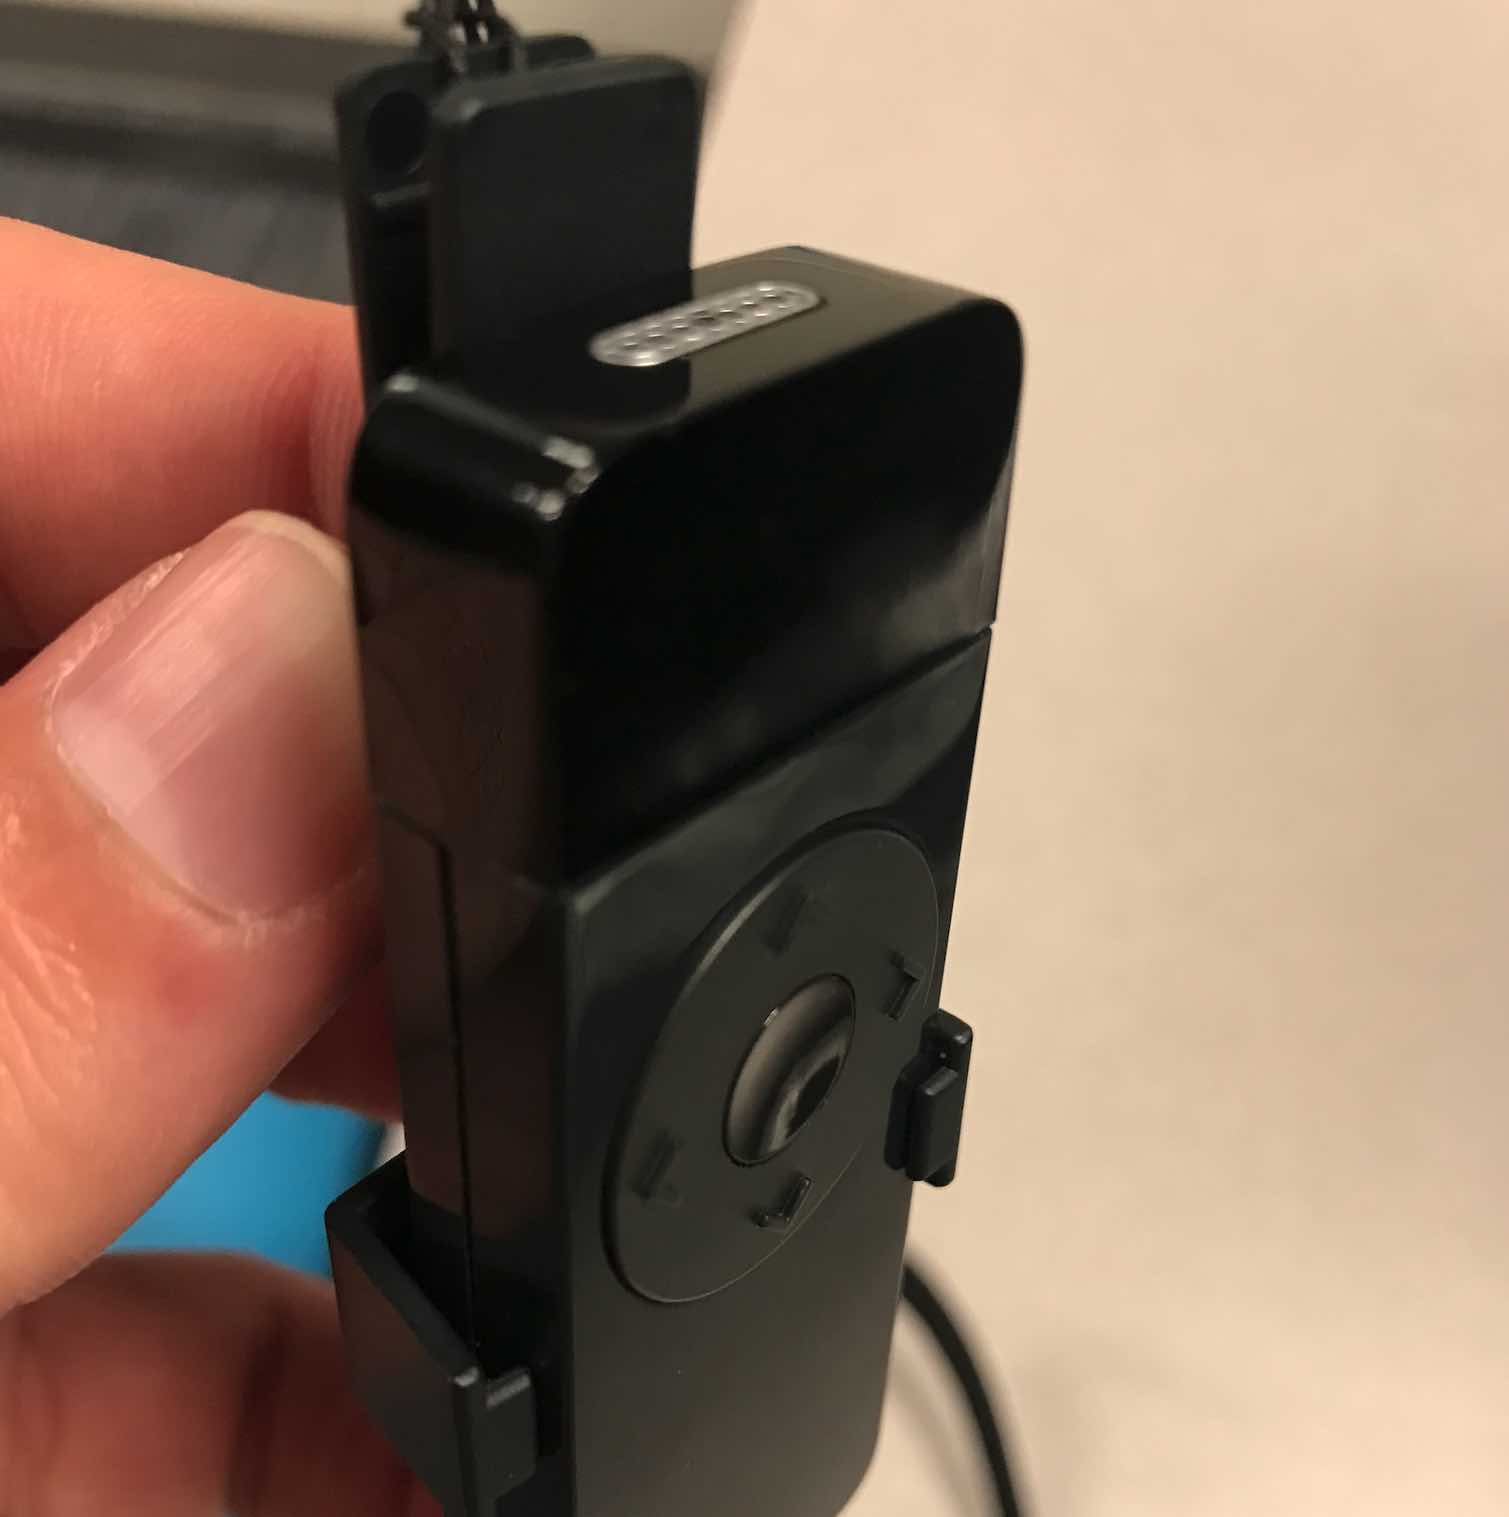
- Turn the Microphone/Marker on by pressing and holding the power button (not the red button) for a second. Lights will come on so that you know it is turned on.
- On the iPad, in the Swivl app, tap the streaming button on the left side of the screen:
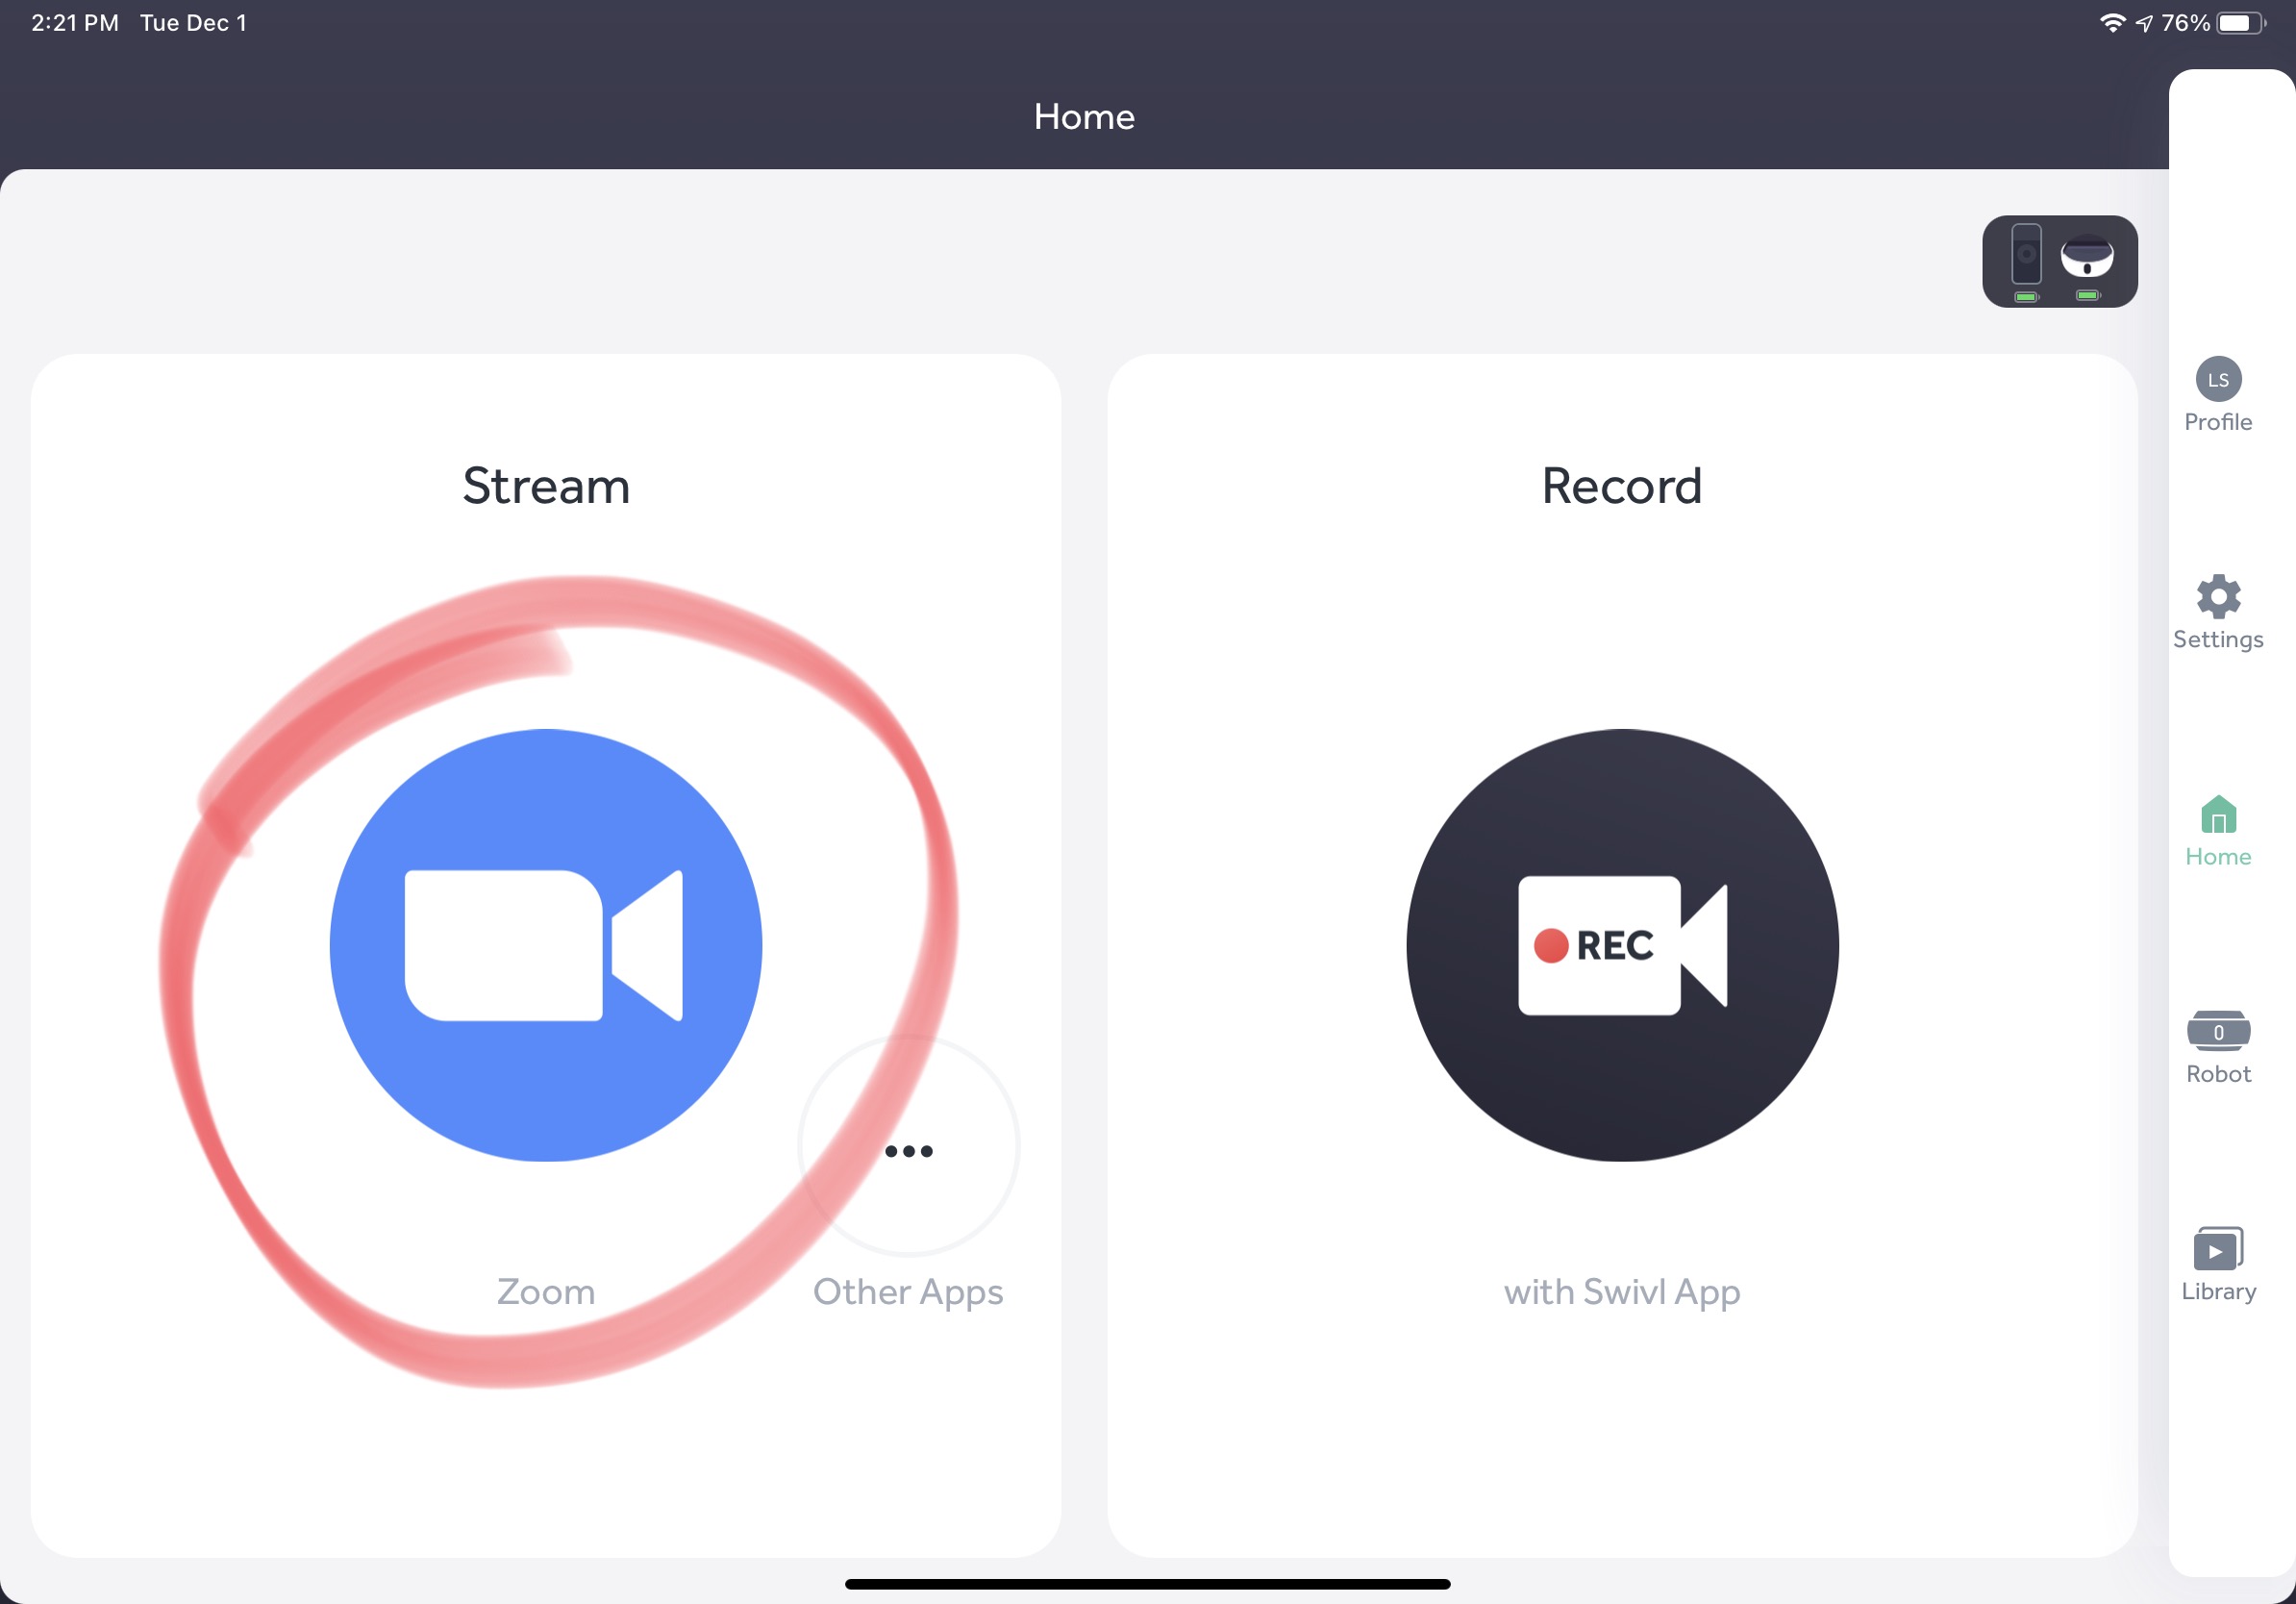
- The Zoom app should launch. You may be asked if this is okay. It is.
NOTE: You could get the spinning wheel of Zoom not loading here. If that happens, there really isn’t anything you can do, and you should send a student to ask Mr. Heibel or Mr. Sommerer for help.
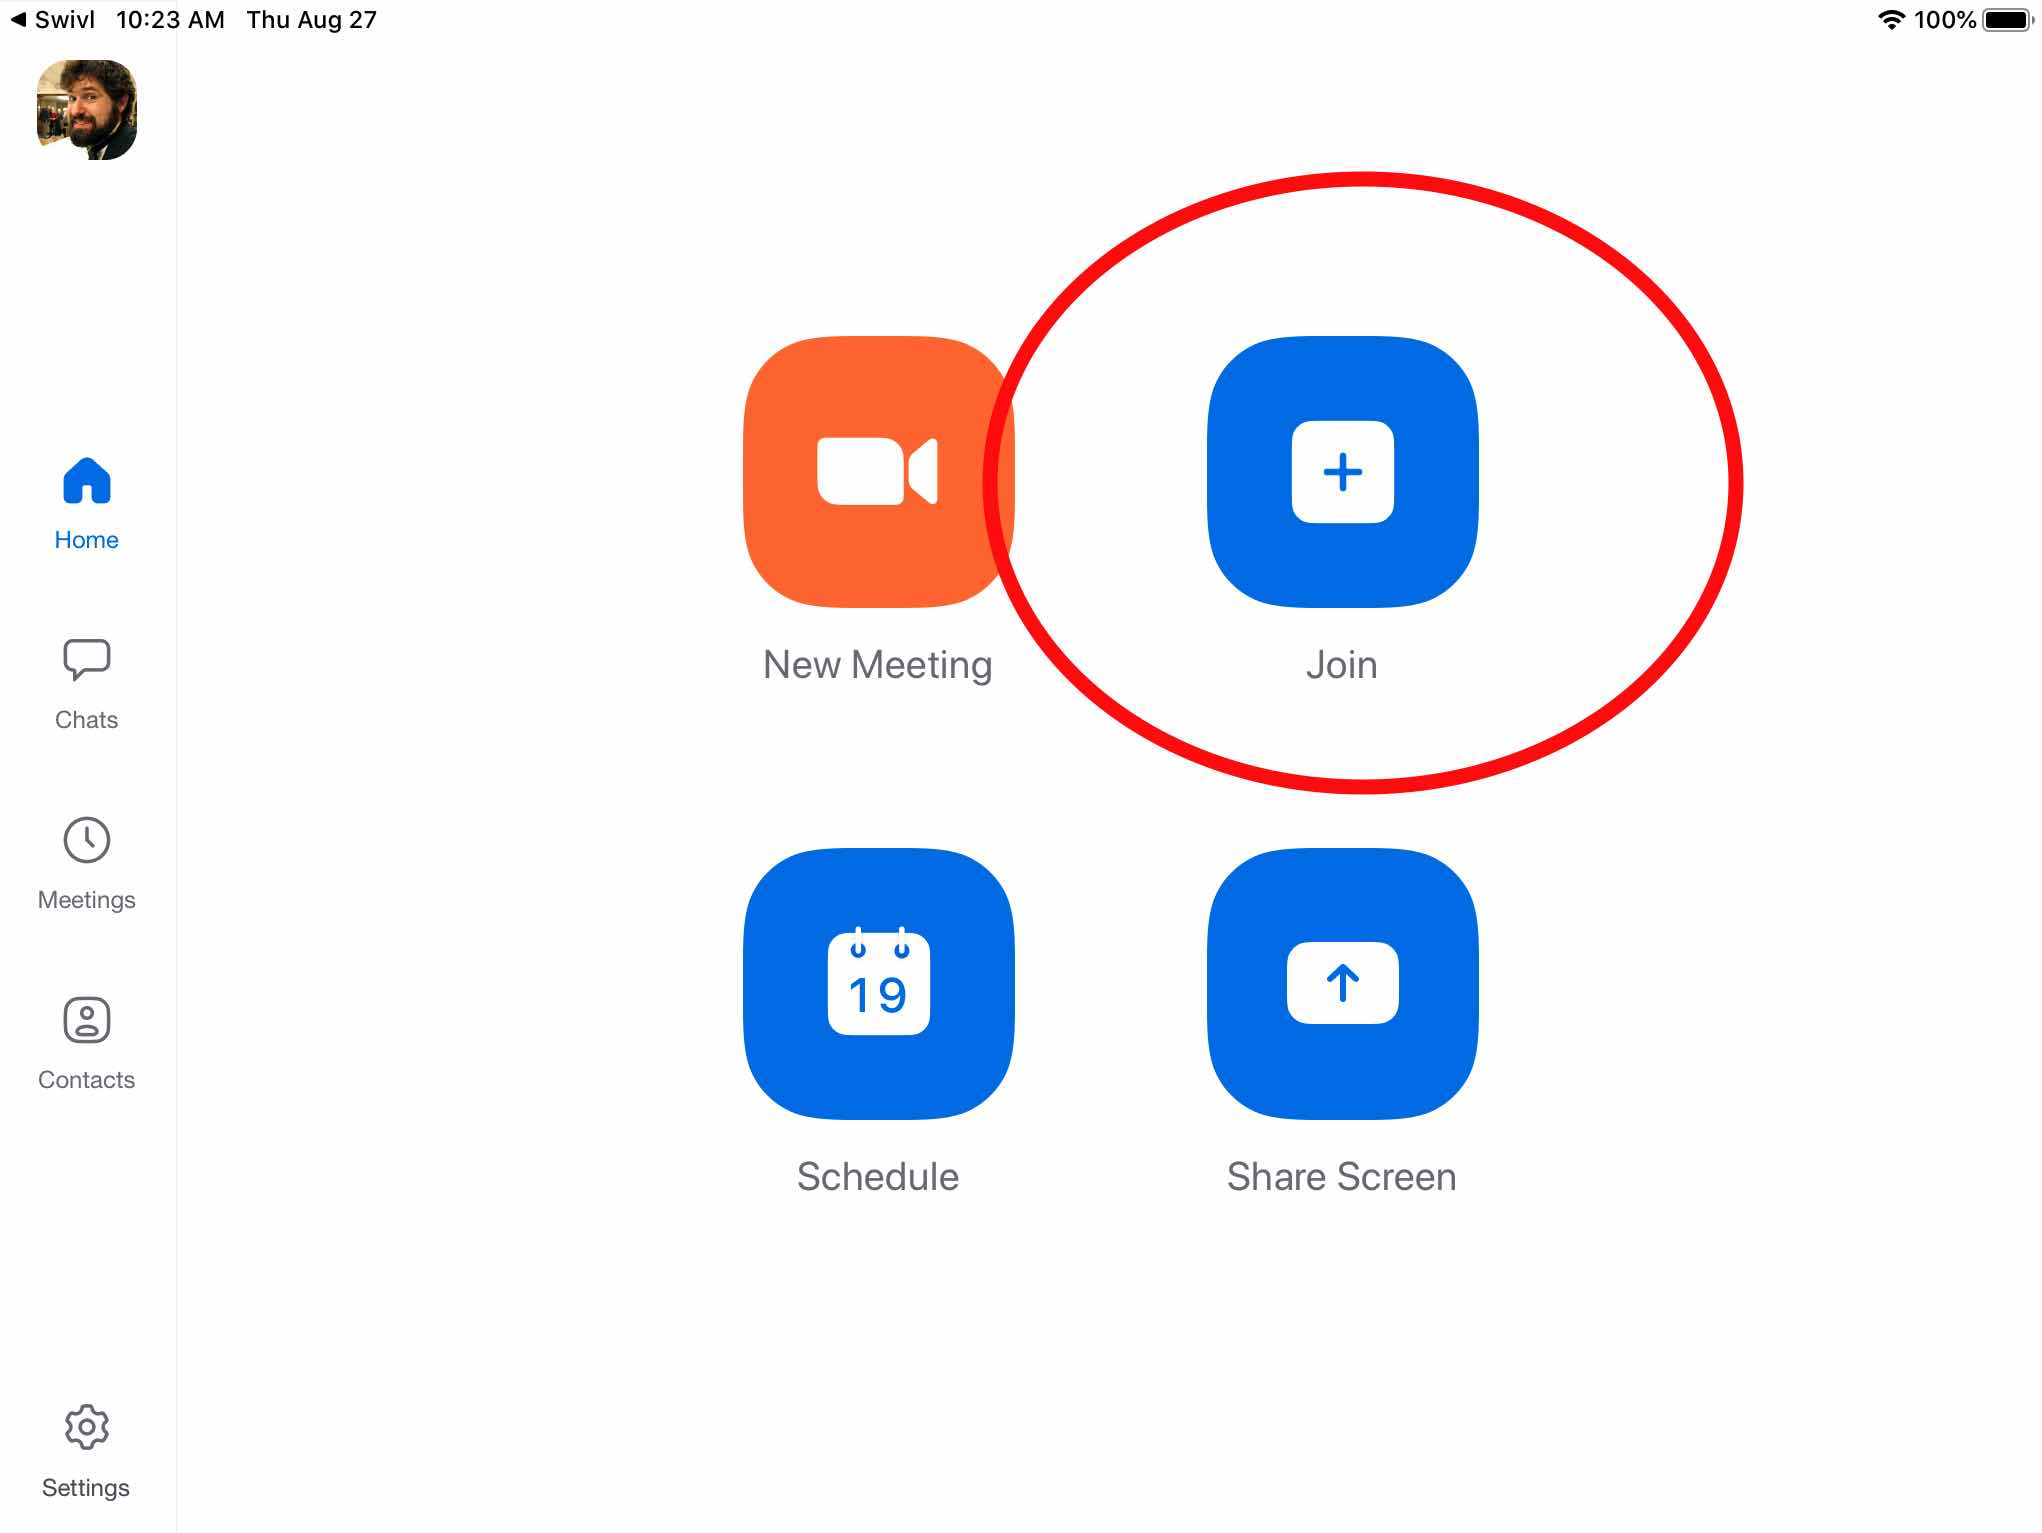
But the Zoom app should launch, and should already be logged in. If it asks you to log in, you can use the Sign in with Google button and the Zoom login information found on the card in the substitute folder. - Tap the Join button to join the Zoom meeting from the Swivl.
- You can either Enter the meeting number directly if you have it handy, or choose the meeting from the drop down list. To pick from the drop down list, click the tiny little arrow near the upper right:
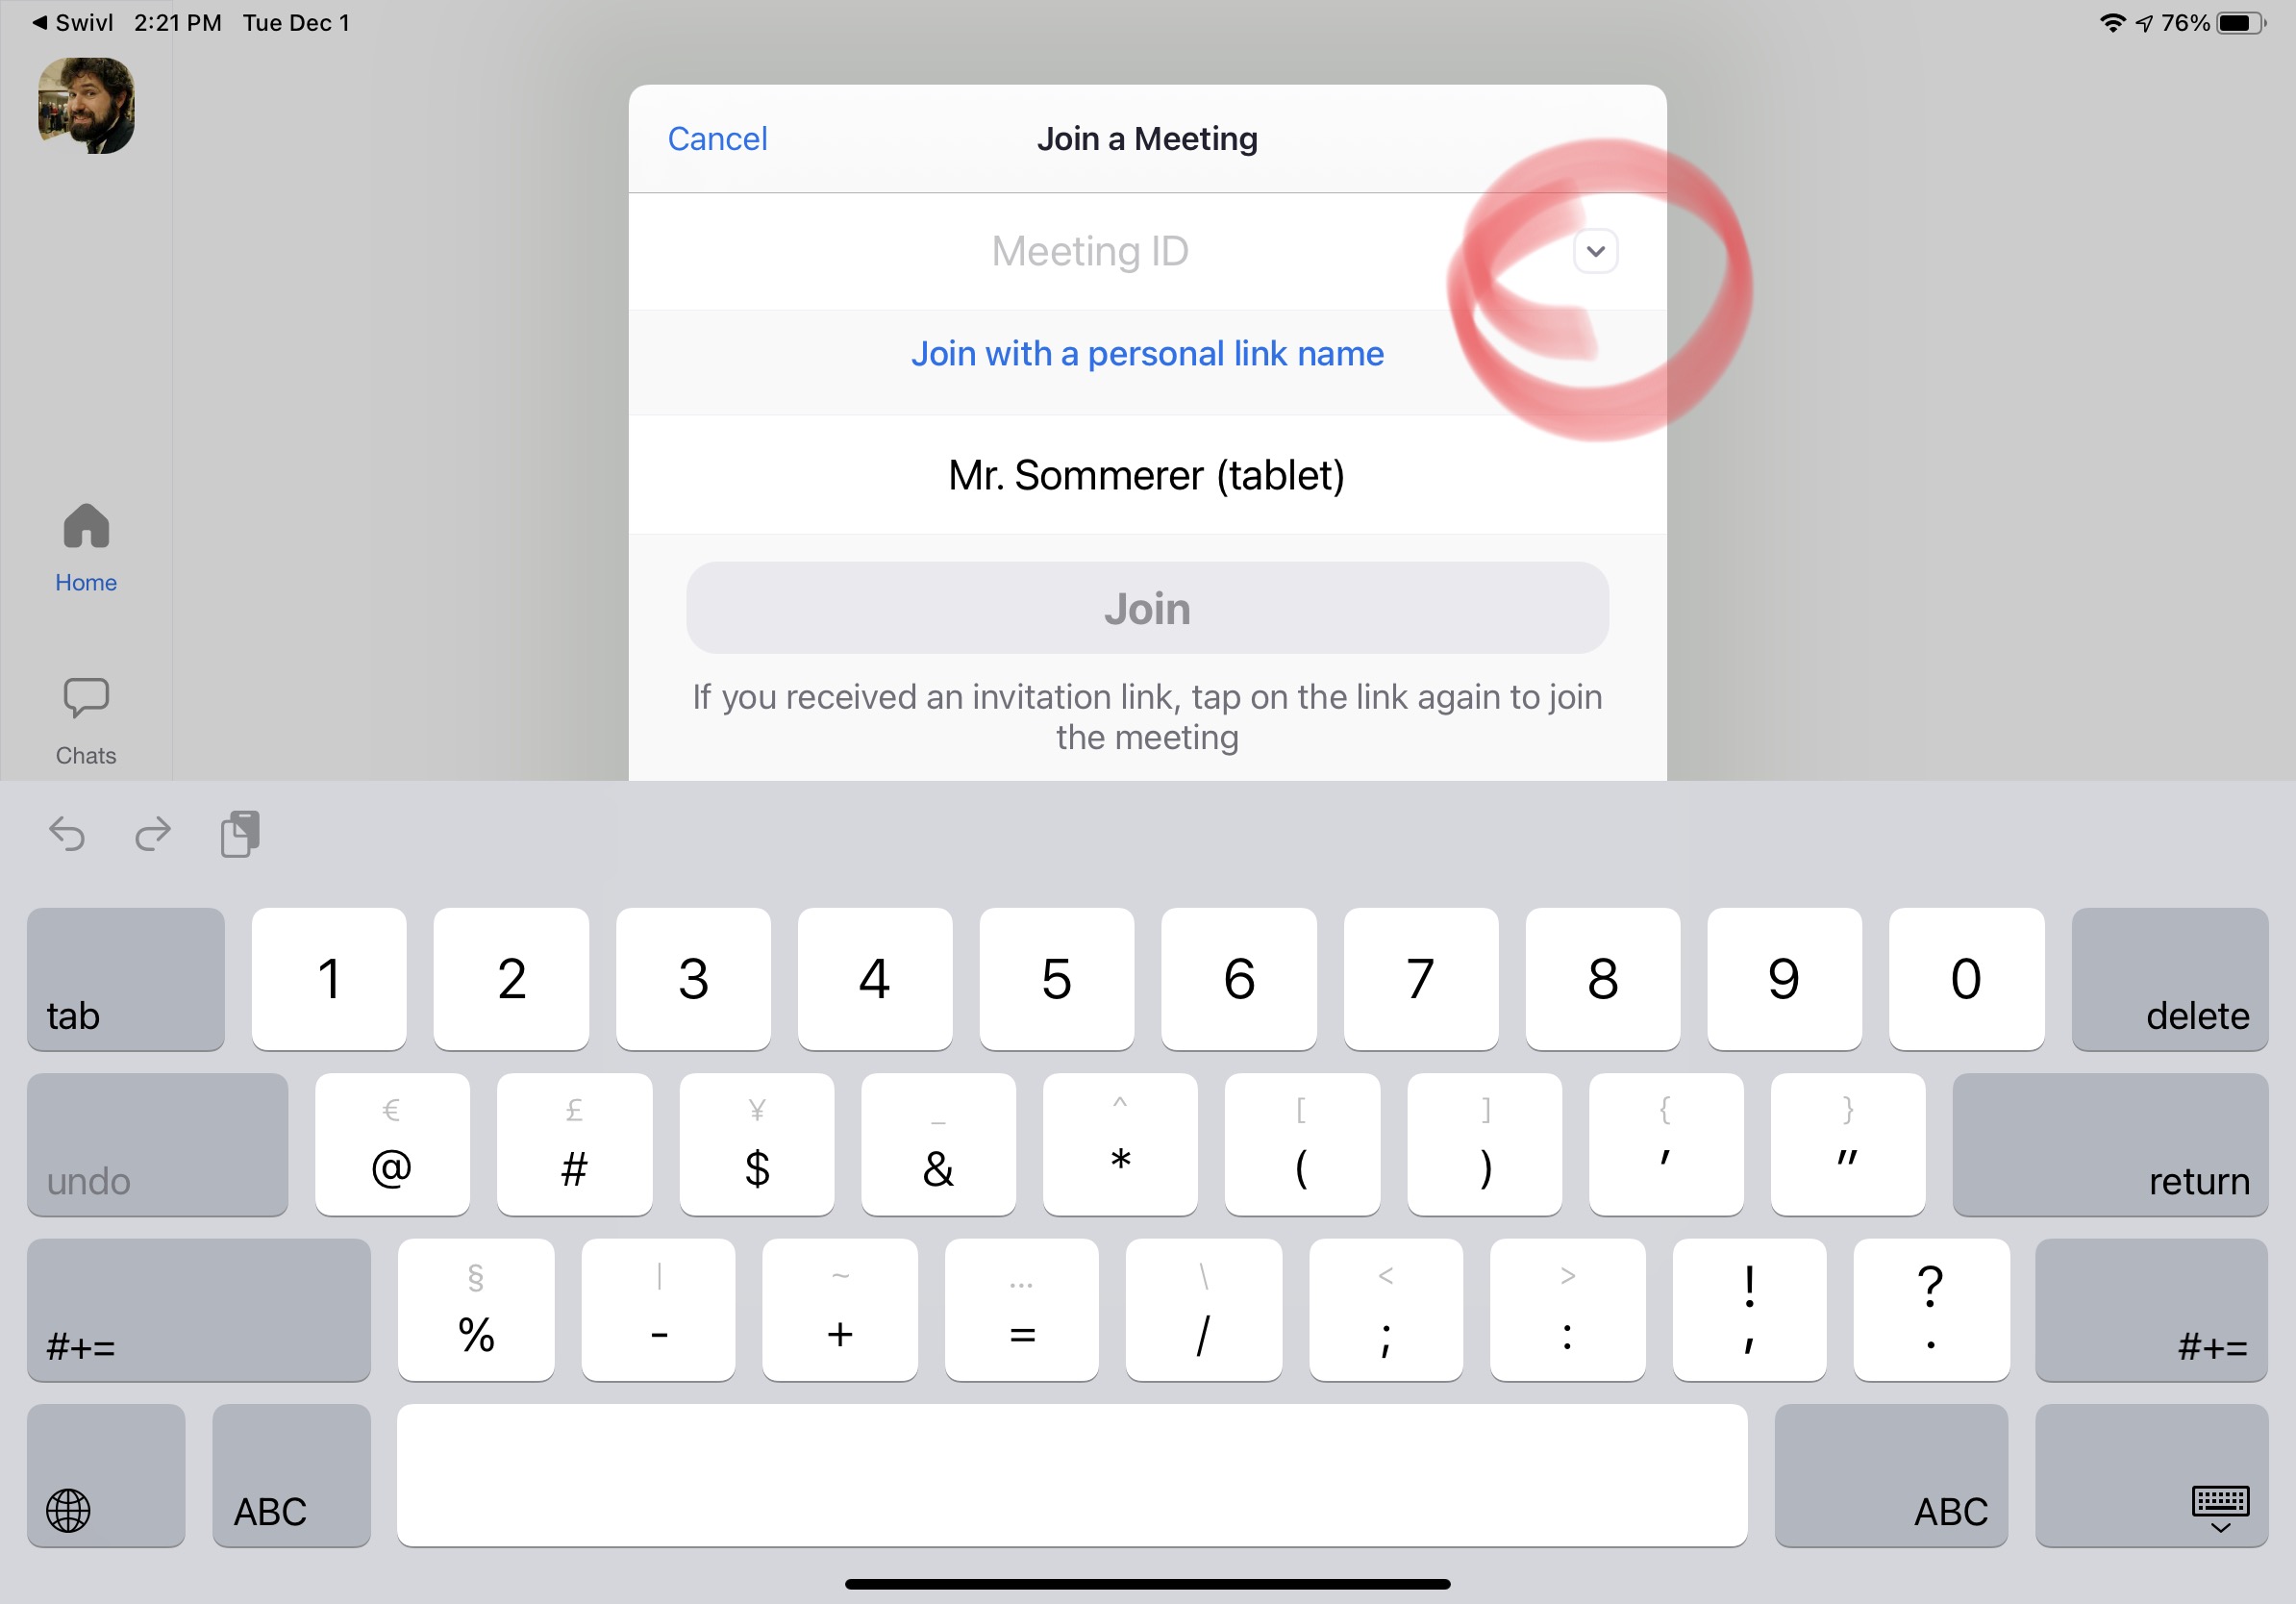
Then select the meeting for the class you are in (some teachers only have one meeting that they use for all of their classes), and click the blue “Done” text. After that you can skip step 16 below.
- If you want to Enter the Meeting ID number for the Zoom meeting directly instead, you can find the number on the list of Zoom Meeting ID numbers in the Substitute folder. Note that some teachers have one number for all of their classes and other teachers have different numbers (different meetings) for each class.

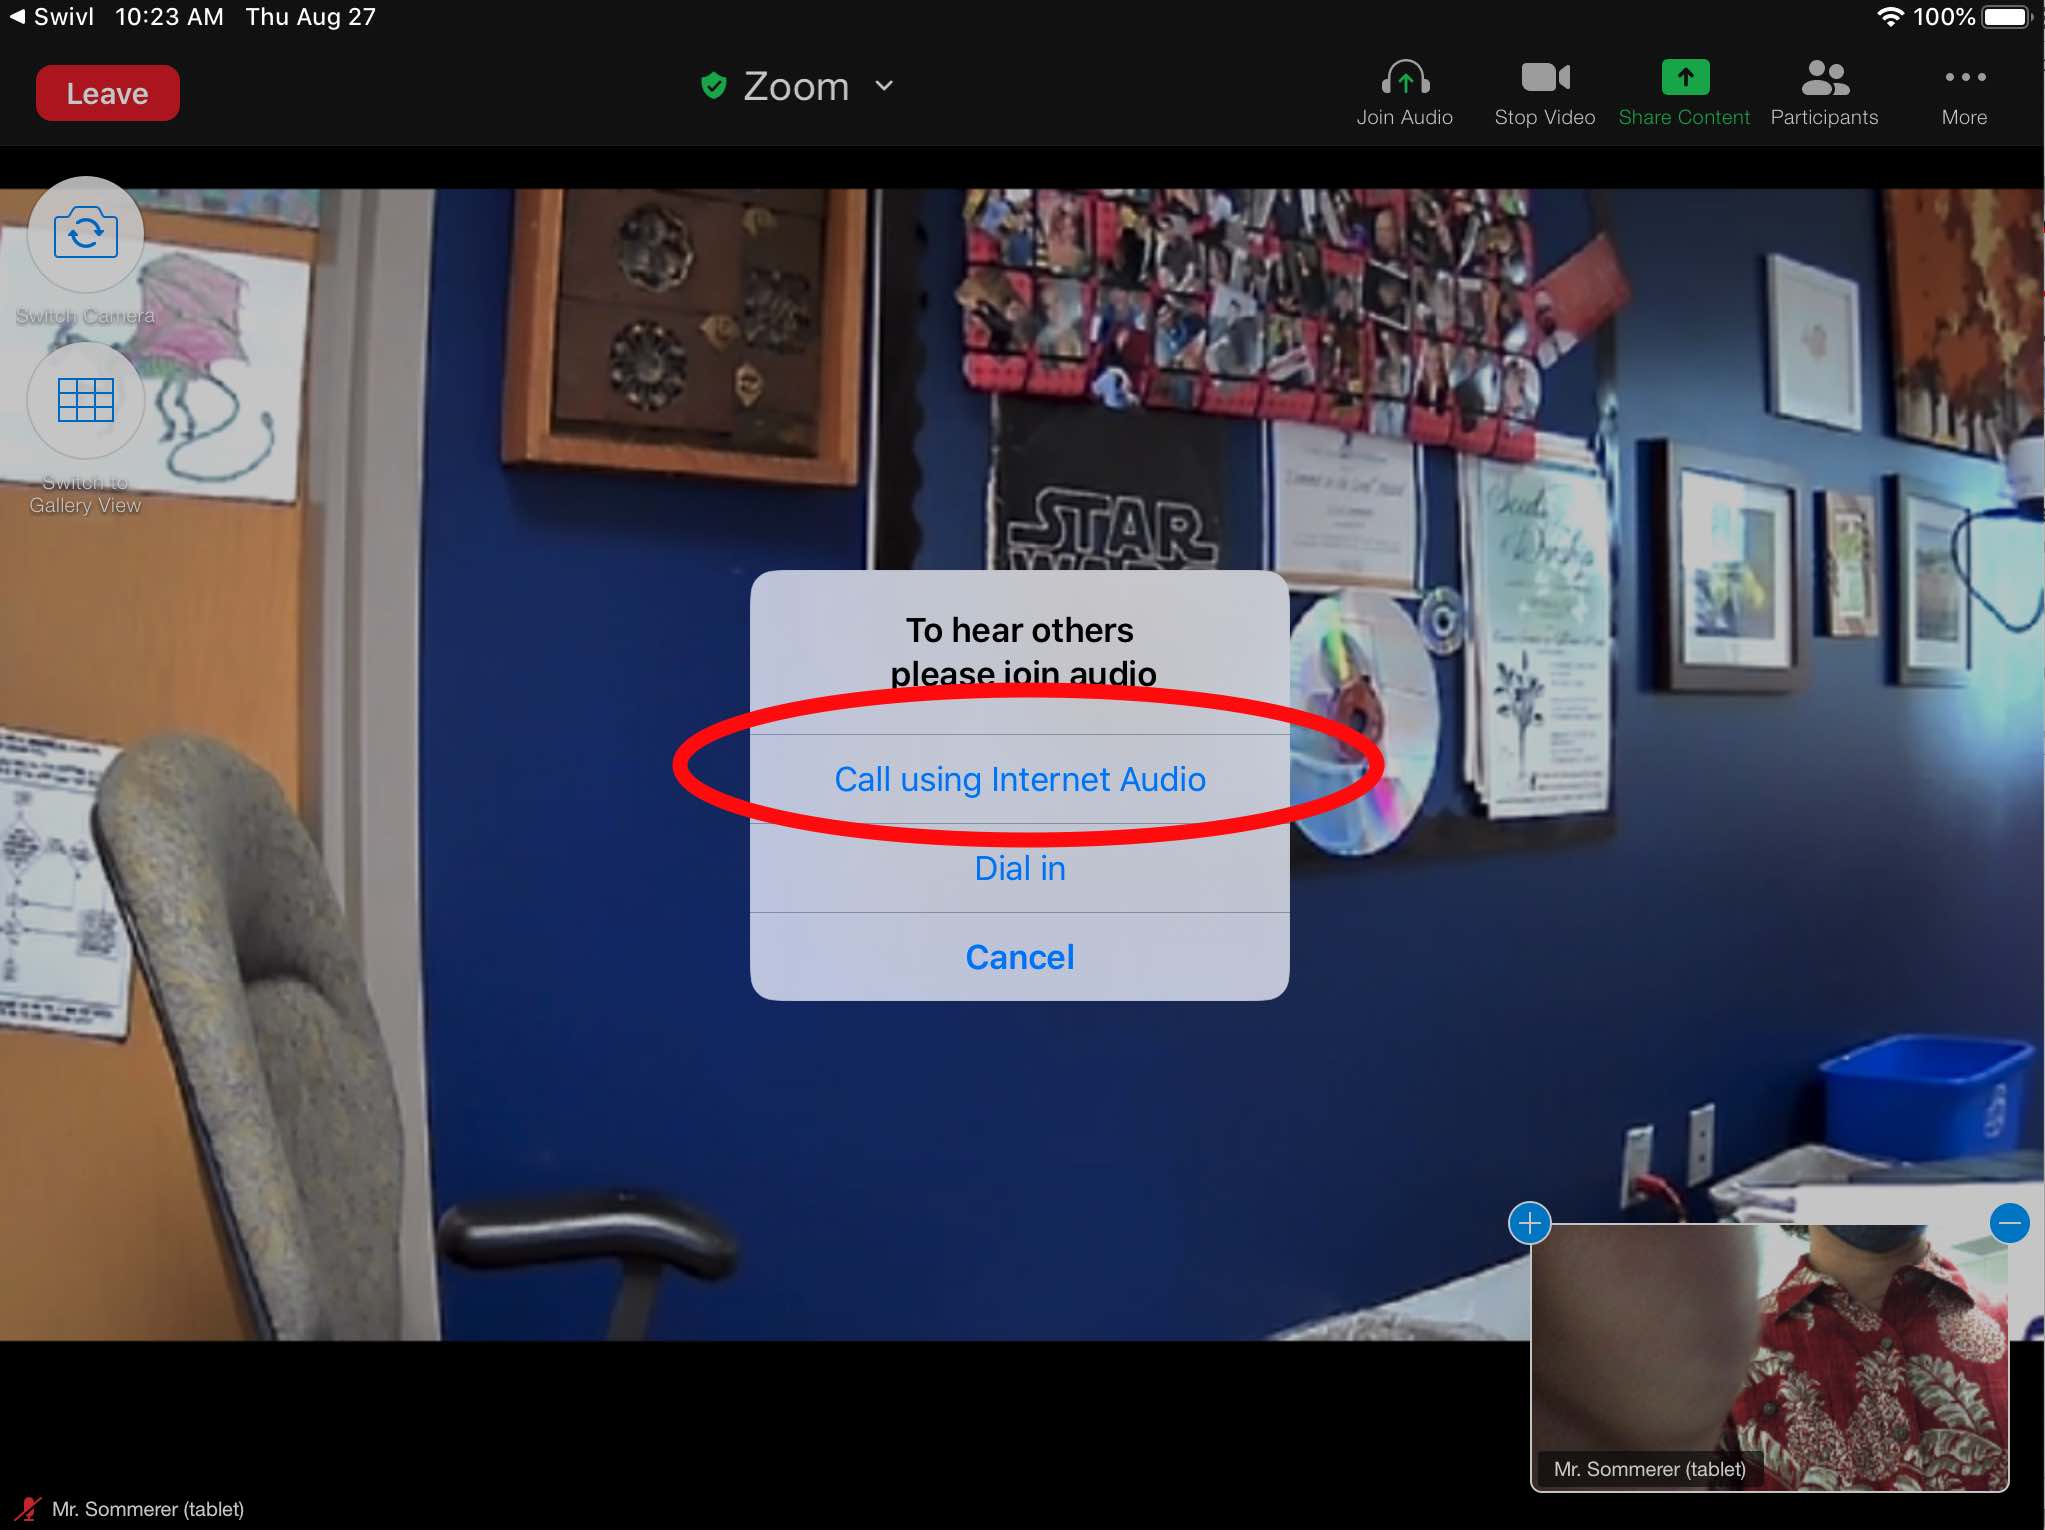
- Zoom will ask you “to hear others please join audio”. You want the first choice “Call using Internet Audio”.
- Unmute the Swivl by tapping the microphone icon near the upper right of the Zoom screen. You might have to tap the iPad screen to see these controls.
NOTE: If you hear feedback, you probably forgot to mute the meeting on the desktop computer or forgot to turn off the volume on the desktop computer or forgot to turn down the volume on the TV. It took us a long time to figure this out.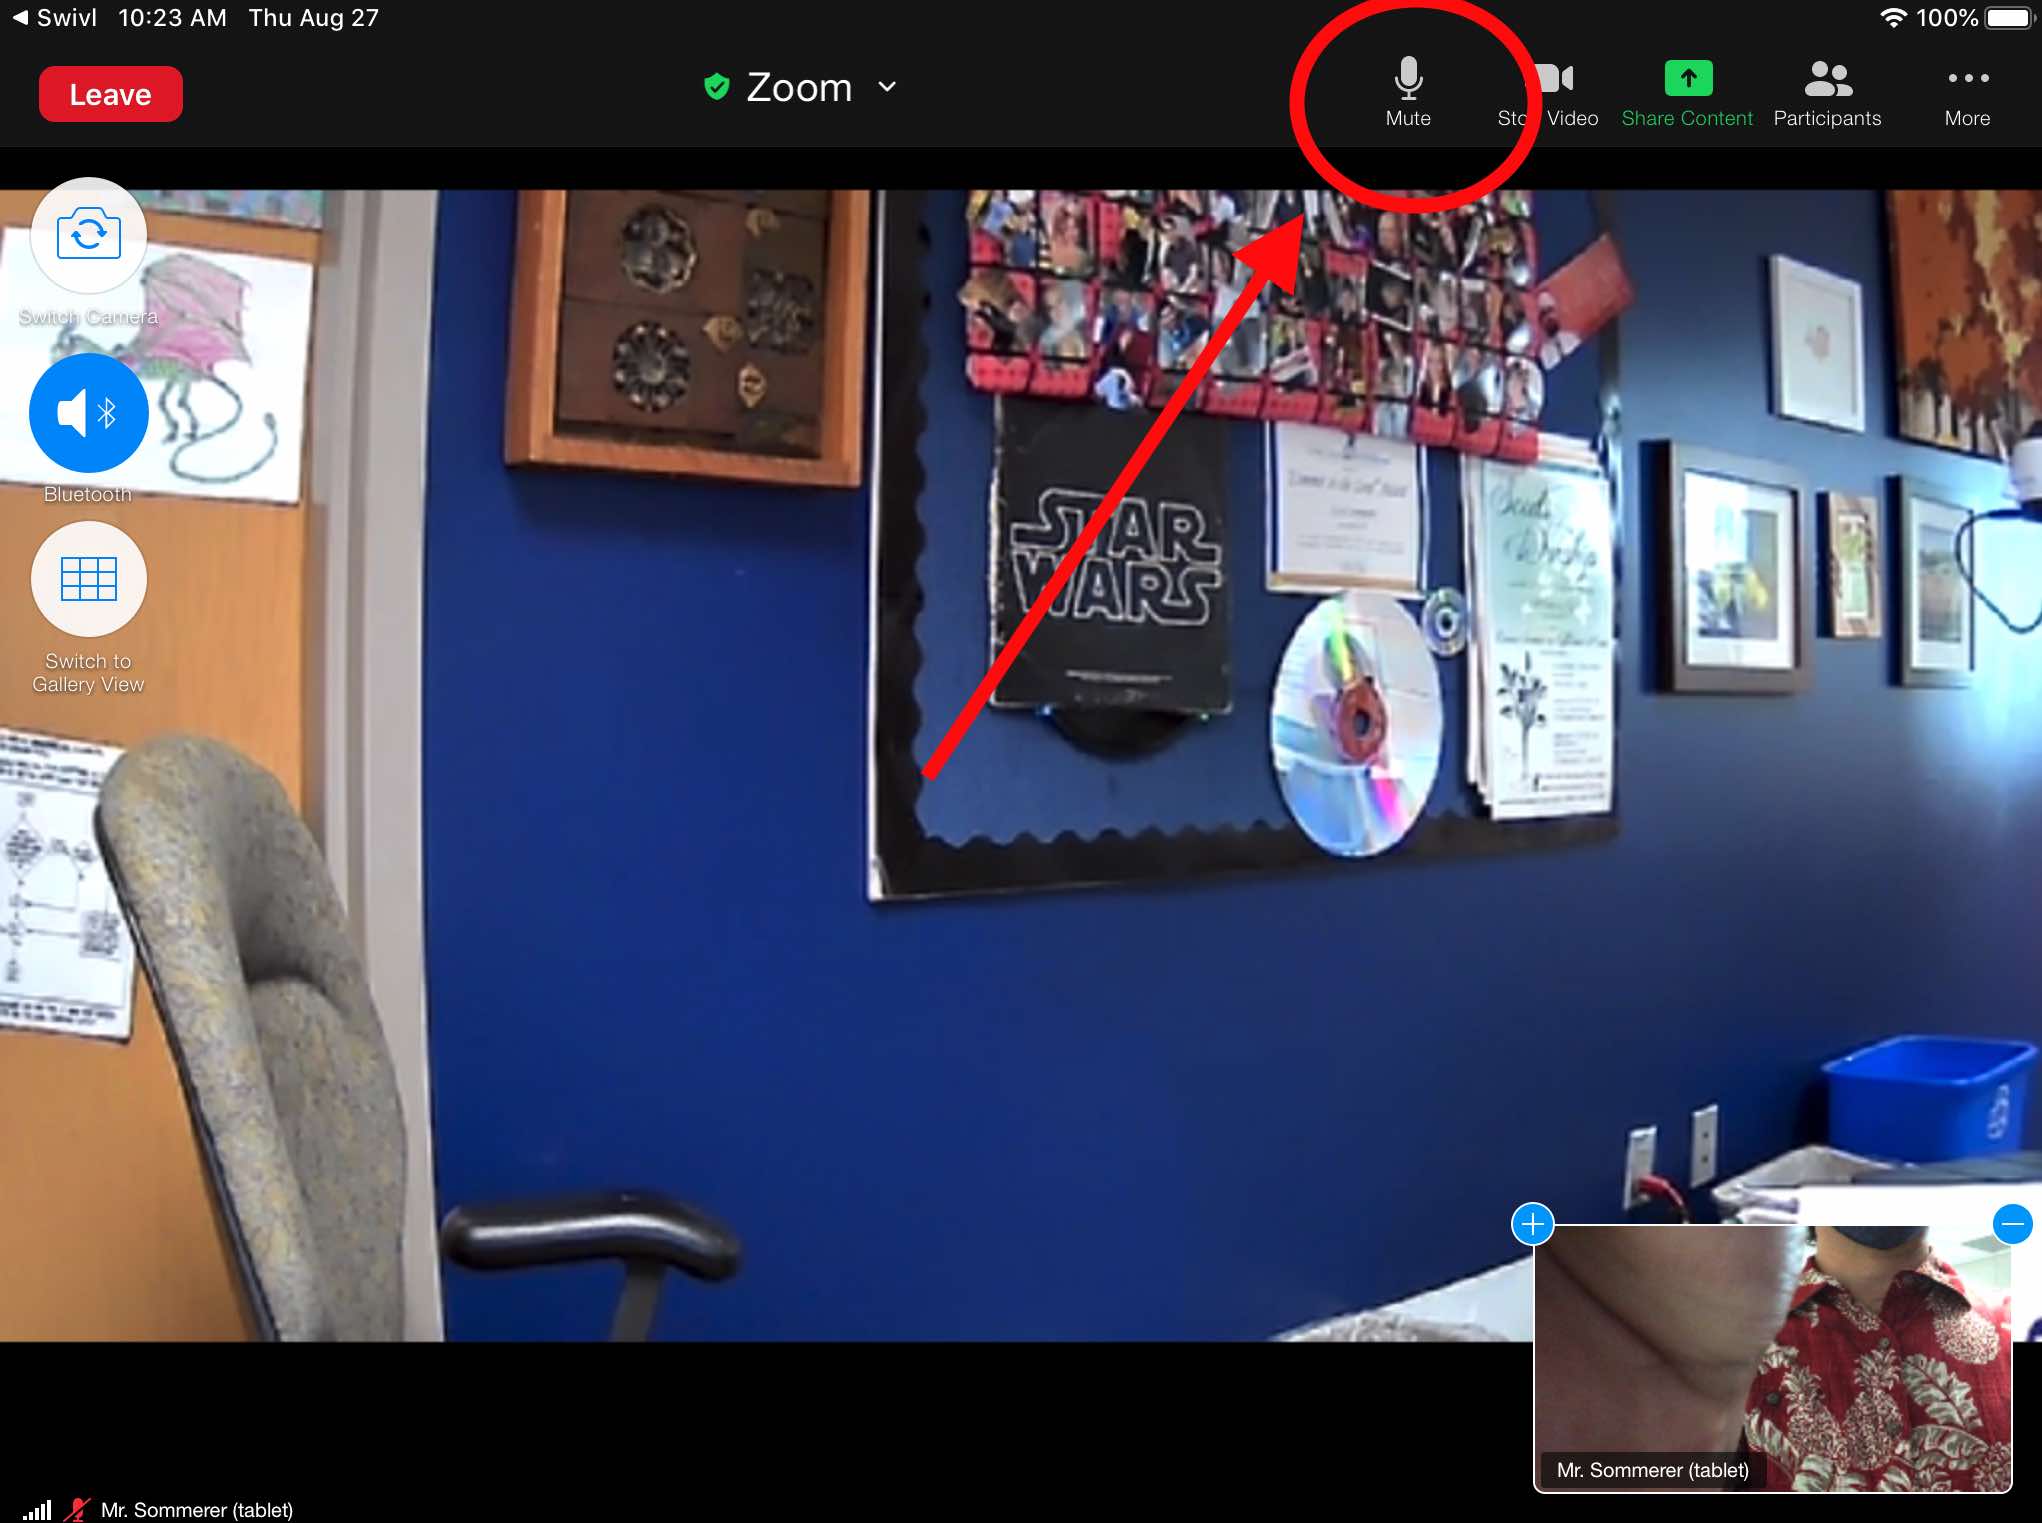
- Check that the regular teacher can hear you through the microphone/marker and that you can hear the regular teacher through the speaker on the Swivl stand. Turn the regular teacher’s volume up by tapping (not pressing and holding this time) on the up button on the front of the microphone/marker 6 times.
- Position the Swivl in the front of the room so that the regular teacher can see as much of the class as possible. You might have to raise the Swivl up by loosening the stand and raising the Swivl.
Okay, what now?
Wow, you just did a lot of work. Congratulations. Your job now is to help facilitate the running of the class. This will mostly involve repeating what the students say (either their questions or answers to the regular teacher’s questions). The range of your microphone is about 5 feet. If you know a student is going to say something, it is probably a good idea to go stand next to them.
During lunch or during your free period, plug the Swivl and iPad back in to charge. The cables will be hanging down from the TV.
Don’t forget some of our new Covid-19 procedures:
- Spray student’s hands with sanitizer (the clear bottle) as they come in the room and as they leave the room.
- Make sure everyone is wearing their mask properly when they can’t be 6 feet apart.
- Spray off the desks at the end of class with the yellow bottle and wipe them down at the beginning of the next class.
Next class of the day?
The regular teacher might need to record the class, and to do that they will need to end the meeting. After they end the meeting, they will start the next meeting. You will need to join the new meeting on the desktop and on the Swivl. Below are quick instructions for doing both. They are just summaries of the full instructions above
Join Zoom on the desktop
- On the tab in the browser that has the Canvas course, click the back button so that you are on the list of classes for the regular teacher. If you see the next course for the next class, just click on it. If you don’t see it, then you are probably in the wrong term. You are in, for instance, Semester 1 and the course is in Hexamester 2. Use the first dropdown box at the top to pick the term that you need, then click on that course.
- On the home page for the course, click on the Zoom meeting link for that course. Zoom should open automatically, but you might have to click to allow it to open.
- Remember to do these things:
- Mute the audio (in the lower left corner)
- Switch to gallery view (after the teacher or a student is in the meeting)
- Move the Zoom window to the projector screen and make it big.
Join Zoom on the Swivl
- You should see the join button on the iPad. You might have to tap the home button to wake the iPad up.
- Type the meeting number for the next class in (it is on a sheet in the sub folder).
- Click “Call using internet audio” in the dialog box that will pop up.
- Unmute the Swivl with the button in the upper rightish area (you’ll have to tap the screen to see these controls).
- tap the up arrow on the microphone/marker about 6 times to increase the volume on the speakers.
- Check that you can hear the regular teacher and that they can hear you.