Initial Setup
- Start the Swivl and iPad normally, and open the Swivl app.
- Plug the Link into the Swivl.
- A firmware update then a configuration update should occur.
- Make sure “Wireless Connection” is the mode NOT “Microphone only”.
- In settings:
- Swivl Link Mode -> Wireless Connection
- Base Port Configuration -> to Link
- Unplug the Link from the Swivl and plug it into the computer
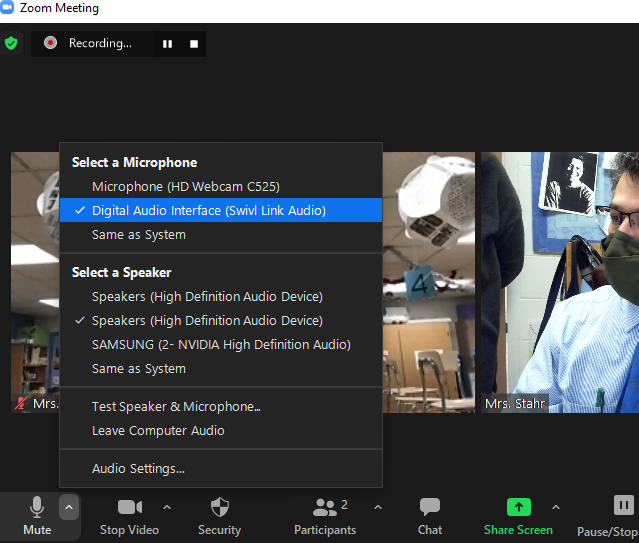
- After a minute or so, the computer should recognize the Link as a microphone. In Zoom on the computer, under the Up Arrow for Audio (next to the microphone icon), Chose the Swivl Link. It might come up as Digital Audio Device something or other.
Daily Setup
- iPad: In Zoom the iPad should be muted (this is different)
- Computer: In Zoom the computer should be unmuted (this is different)
- Check that you can hear audio played on your computer. I recommend this.
- Check that “(Swivl Link Audio)” is selected as your microphone on your computer (see #7 above)
Notes:
- If you ever want to use Zoom without the Swivl, you’ll have to switch from the Link microphone to your webcam microphone. You do that with the up arrow by the microphone icon in Zoom.
- If you can’t hear the remote students, first make sure you can hear anything, by playing a Youtube video or something.