Each semester you have to setup Traditional Grade Calculations in PowerTeacher Pro. Don’t put this off, because students and parents will complain if their grades suddenly change for no apparent reason in the middle of the semester.
Go to Traditional Grade Calculations
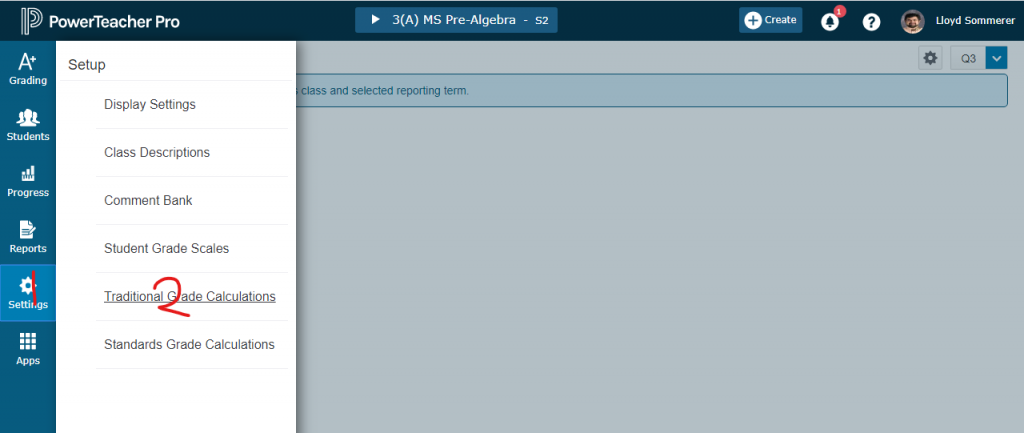
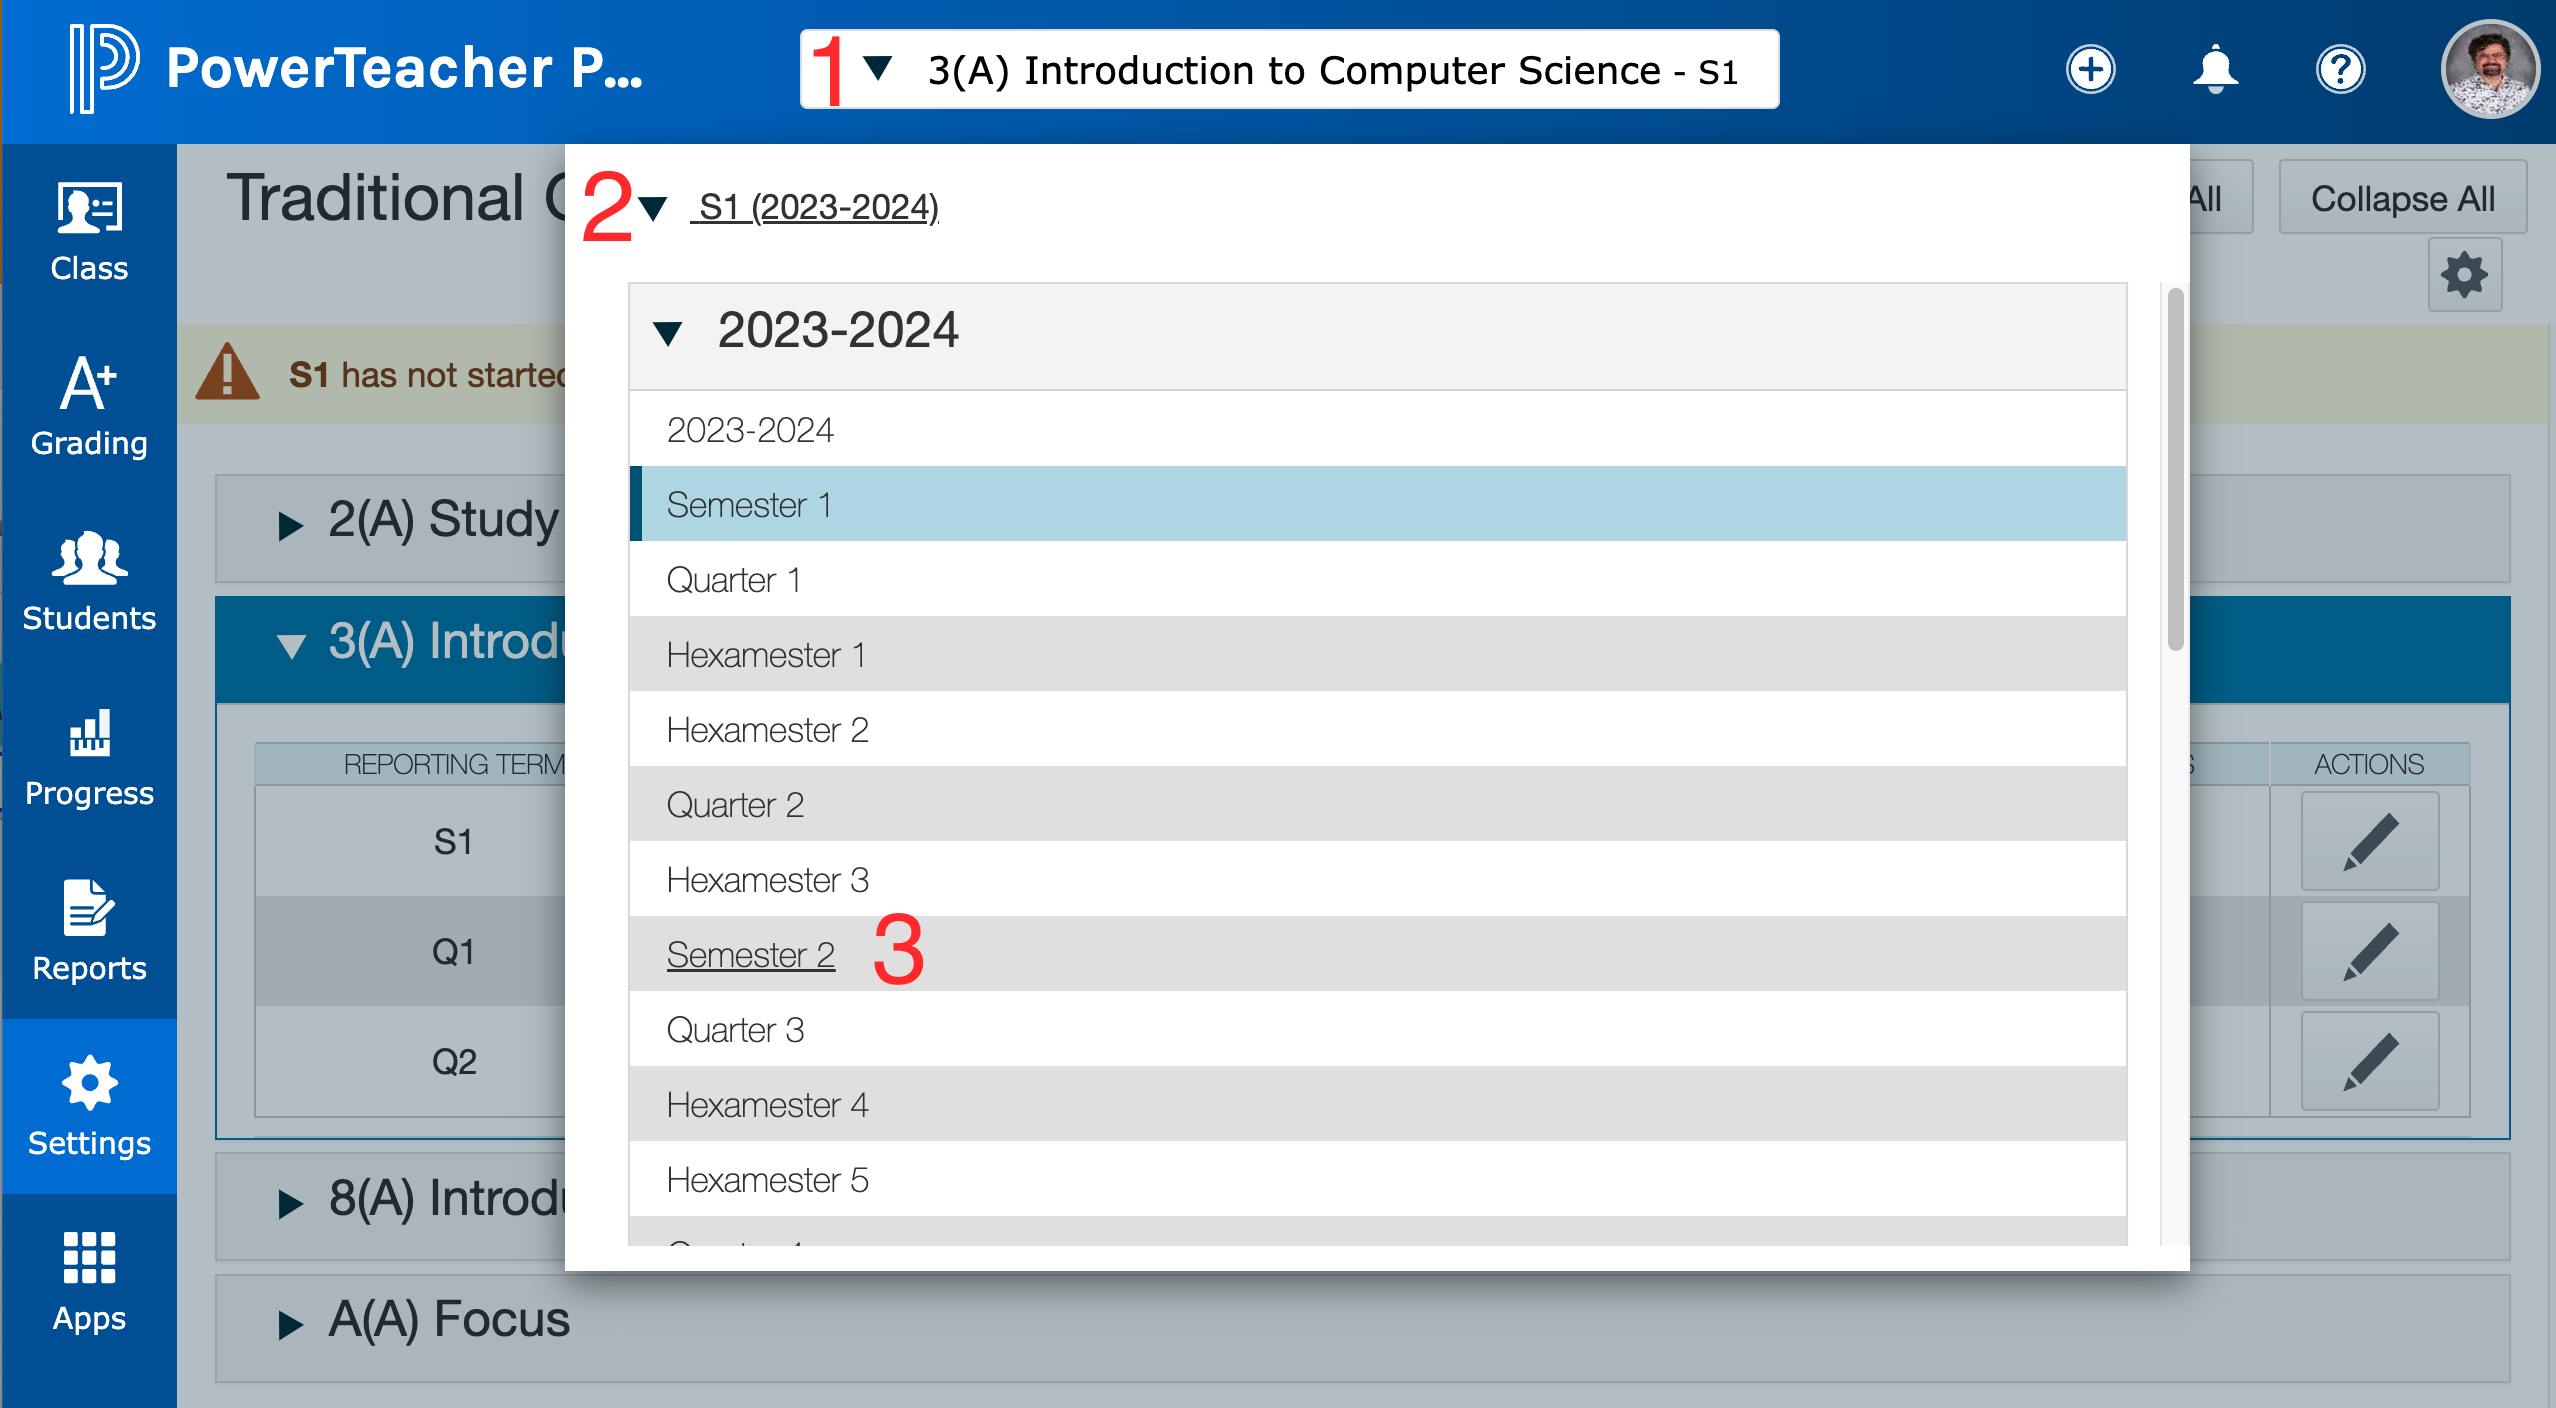
Log into PowerTeacher, click on PowerTeacher Pro, click on Settings (1) then click Traditional Grade Calculations (2).
Note: Copying Traditional Grade Calculations
If you have classes that are setup the same —either in the current semester/year or previous years— you can copy Traditional Grade Calculations between classes. This will save you a lot of time.
7th – 12th Verify the semester/hexamester setup
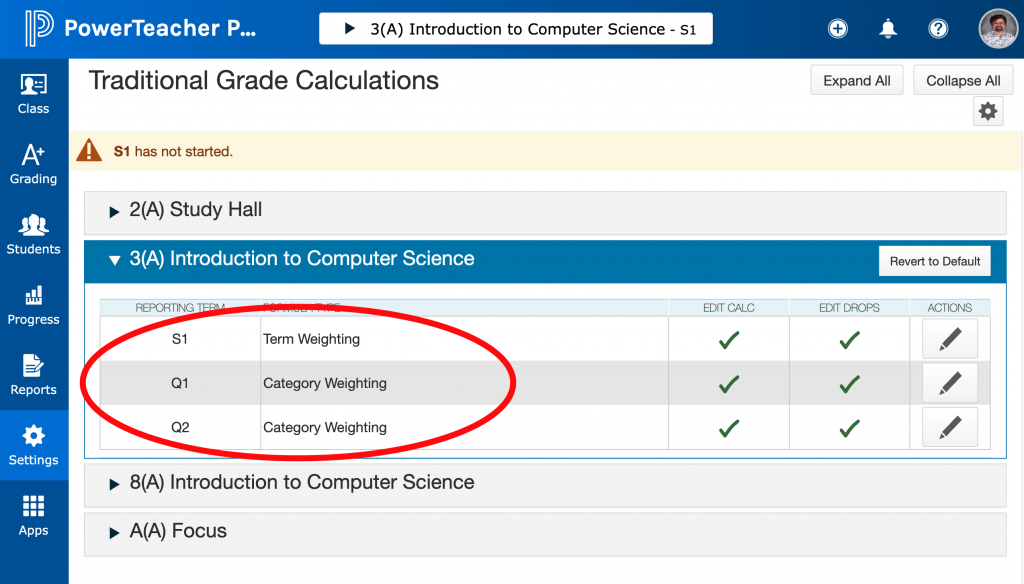
Starting with your first class, click the arrow next to the class to expand that class and verify that it has these reporting terms:
Semester 1
S1: Category Weighting
Q1: Category Weighting
Q2: Category Weighting
Semester 2
S2: Category Weighting
Q3: Category Weighting
Q4: Category Weighting
Any Hexamester:
H?: Category Weighting
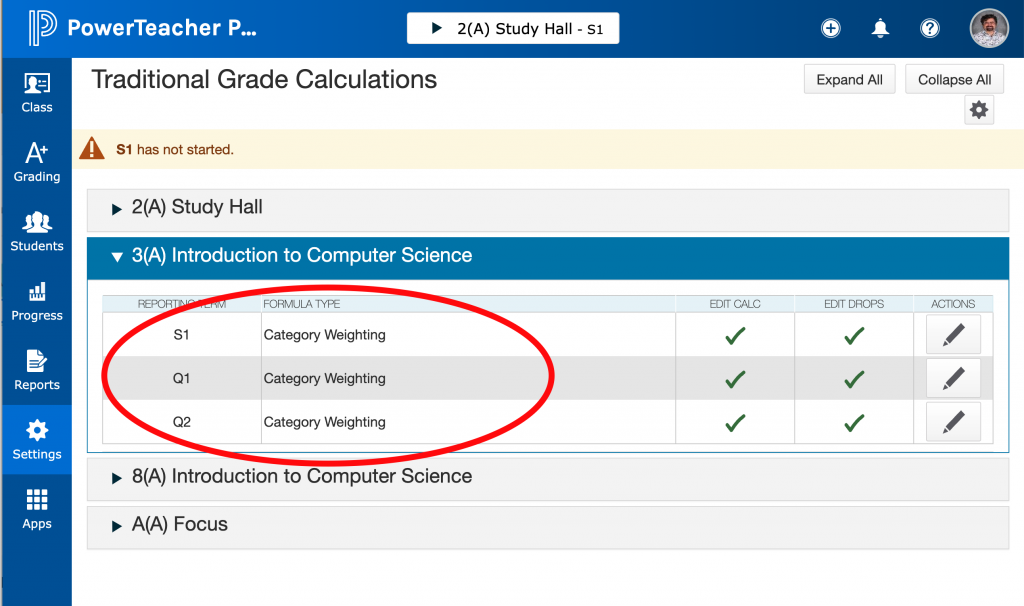
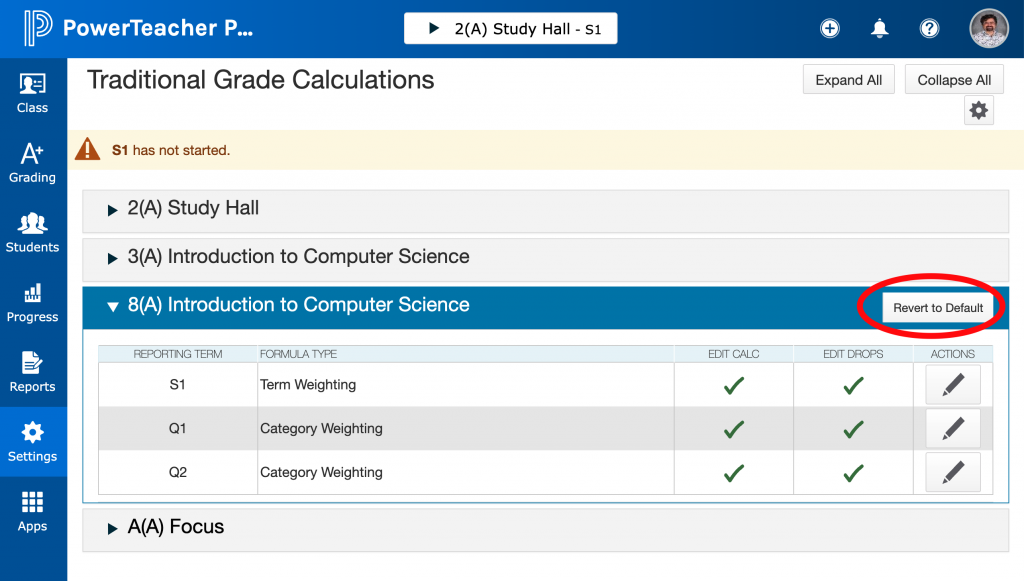
If this is a semester class and it has ANYTHING ELSE in the red circle, you should fix it by clicking on the Revert to Default button.
7th – 12th Edit the semester/hexamester setup
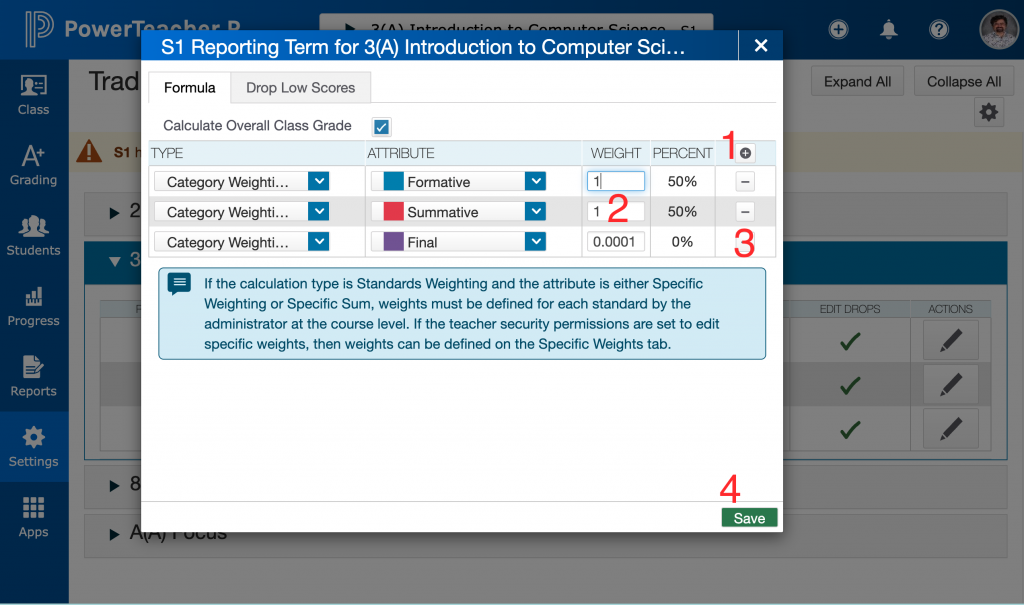
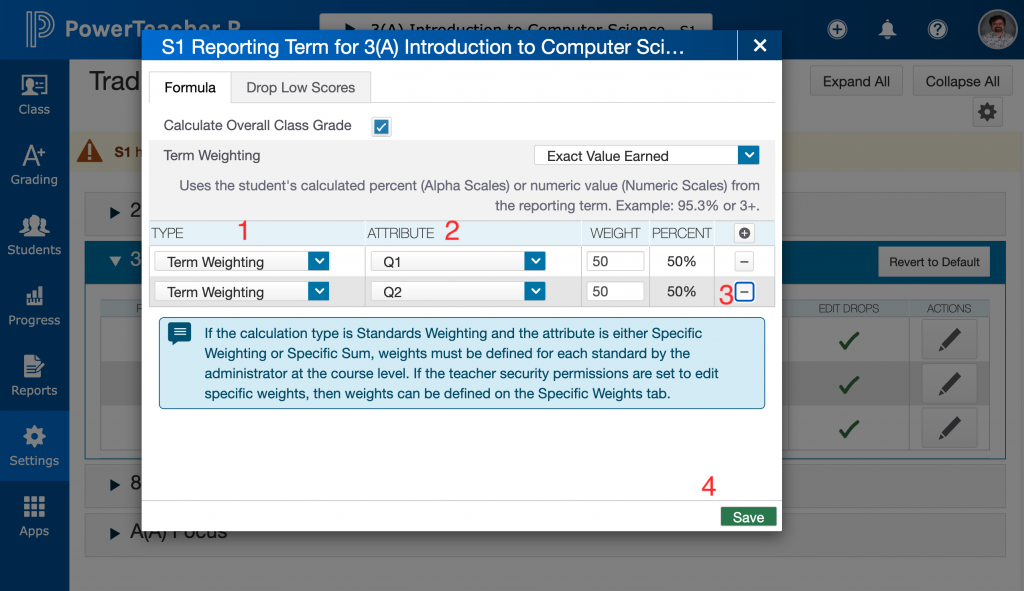
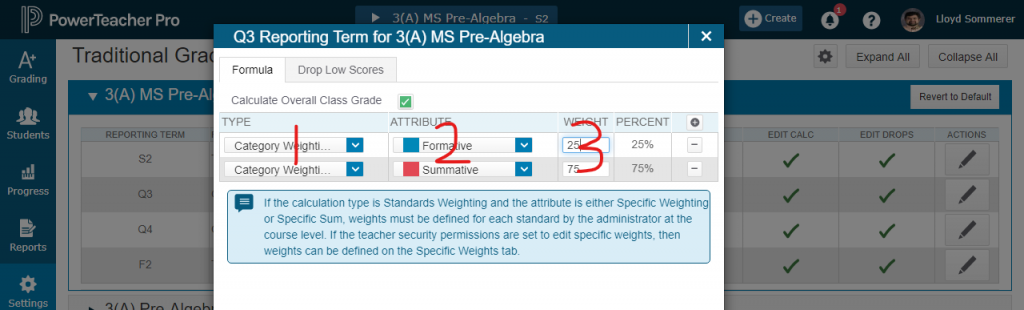
Click on the pencil icon to the right of the semester/hexamester, and verify that your categories match the way you do grades for your class.

You can add new categories if you need to with the + button (1). You can edit the weight for each category directly (2). Remember that your summative and formative weight should follow the grading guidelines. To remove a final, click on the minus sign on the right of the final (3). It will not work to change the weight of the final to zero. NOTE: It is also okay to leave the final in place with its current weight. PowerSchool will ignore the final if there are no assignments in that category. Click Save (4) when you are done.
Notes for grades 7th – 12th
- After you setup one class, it is a lot easier to copy grade setups than it is to set each of the sections/classes up individually.
- You can setup classes for Semester 2 at the start of the year by clicking on the blue class selector at the very top of the screen and using the triangle dropdown in the upper left to change to the second semester. I mean, you’re there already and you know how to do it now.
- After you are finished setting up the Traditional Grade Calculations for all of your classes, you might want to Setup Canvas to sync to PowerSchool.
6th grade verify the semester/hexamester setup
Starting with your first class, click the arrow next to the class to expand that class and verify that it has these reporting terms:
Semester 1
S1: Term Weighting
Q1: Category Weighting
Q2: Category Weighting
Semester 2
S2: Term Weighting
Q3: Category Weighting
Q4: Category Weighting
If this class has anything else in the red circle, you can use the pencil icons to the right of each term to fix it. The semesters should each look like this:
If it doesn’t look like that, change the Types (1) and the Attributes (2) until they match. You might have do delete extra entries (3). When you’re done, click save (4)
6th grade edit the categories for each quarter
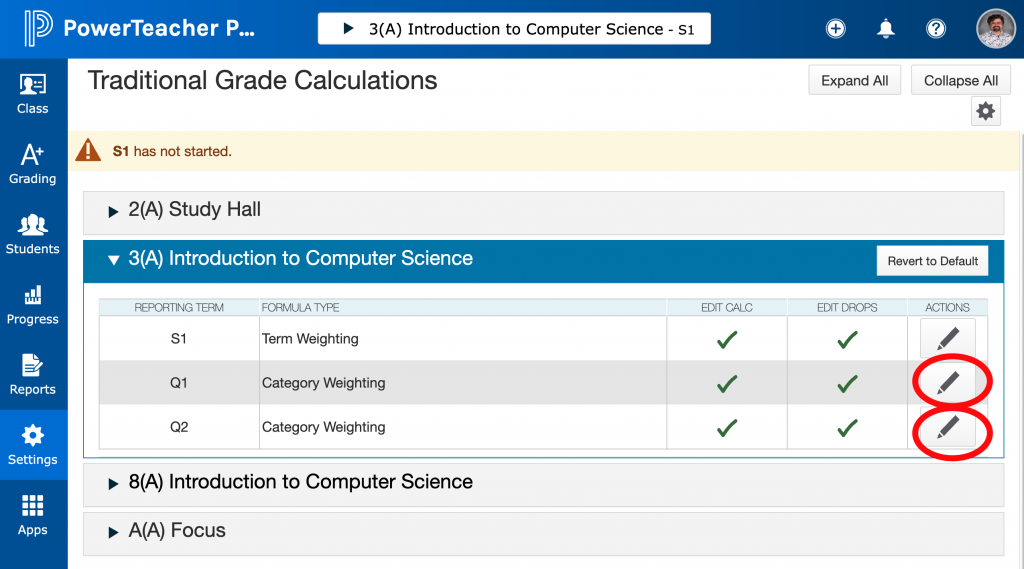
You have to tell PowerSchool which of your categories you will be using for each of the quarters. You do this by clicking on the pencil icon to the right of each quarter:
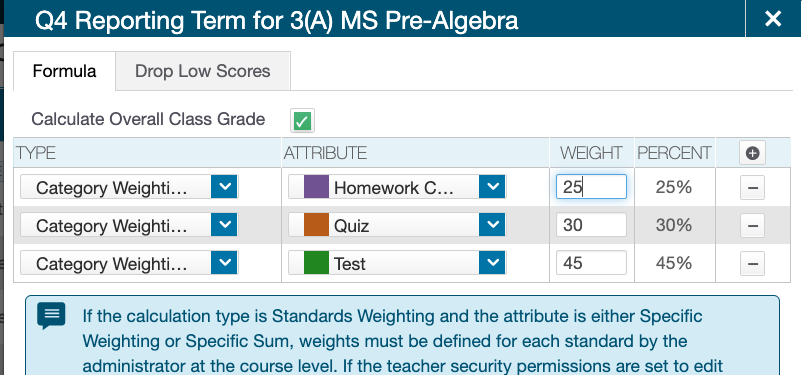
Using the drop down fields, change the types (1) to Category Weight. Change the Attribute (2) to the categories that you are using for this class. You can add additional categories by clicking the plus sign on the right hand side. If you need to create a new category, you can do that by exiting this screen and using the + Create button at the very top of the screen. When you create a new category, you can say which classes will use it and many of the default values. There is a PowerSchool help document with more information on creating categories. Change the Weight (3) for each category so that you are aligned with the formative/summative grading guidelines for either 6th Grade (30/70), 7th & 8th Grade (25/75) or High School (20/80).
Note: You can use other categories in this section as long as the weights of the categories correspond to the grading guidelines. So this would be acceptable as well:
When you are finished with this quarter/hexamester, click Save at the bottom right and continue to the next quarter.
6th grade notes:
- After you setup one class, it is a lot easier to copy grade setups than it is to set each of the sections/classes up individually.
- You can setup classes for Semester 2 at the start of the year by clicking on the blue class selector at the very top of the screen and using the triangle dropdown in the upper left to change to the second semester. I mean, you’re there already and you know how to do it now.
- After you are finished setting up the Traditional Grade Calculations for all of your classes, you might want to Setup Canvas to sync to PowerSchool.